

Do you see a pop-up window called UsoClient.exe every time you start your computer? Are you worried about how often this UsoClient startup window appears? Is it malware? Rest assured, the answer is: NO!
When this occurs and doesn't disappear, it's very often due to a Windowsupdate error…
Discover in this article everything you need to know about UsoClient and the different methods available to disable it.
What is Usoclient Windows 10?
Also known as " Update Session Orchestrator ", UsoClient is a component of Windows Update. UsoClient.exe is therefore an EXE file developed by SHIT and found on the Windows 10 Operating System.
The main purpose of this file is to automatically check for available updates. The Windows is located in the System32 folder on all PCs.
When you open this folder, right-click, and select properties, you'll see that it is indeed a Windows 10 component. The latest version of this file is 10.0.10240.16384 created by the Microsoft team!
UsoClient Windows 10 or malware?

To ensure that the pop-up windows are indeed caused by UsoClient, perform a scan using your Task Manager. You can do this using the keyboard shortcut Ctrl + Shift + Esc.
If this is not suitable for you, you can right-click on the taskbar and then select the " Task Manager " option.
After that, follow these different steps.
Step 1: In the Task Manager search bar, search for the file " UsoClient.exe ". Feel free to browse the list of all processes.

Step 2: Do you see the UsoClient.exe file in the results? Great! Right-click on it and then choose the "Open file location" option.
Step 3: If you see the file in the location: "C:\ Windows \System32\" , rest assured, you are safe! However, if you find that the location is elsewhere, it is likely that your computer is subject to malware attacks. You should then use good antivirus software.

Here are the best malware analysis programs currently available on the market:

How do I disable UsoClient on my Windows 10 computer?

The UsoClient.exe file can be disabled on your computer if you wish. The question, however, is whether it's safe to disable UsoClient on Windows 10. Well, the answer is: YES!
There's no problem if you want to disable UsoClient. What you should avoid doing is permanently deleting the program . This could cause problems on your computer.
Related articles: Windows Task Host : Here's everything you need to know!
A quick note before we begin: be aware that disabling the UsoClient.exe program will undoubtedly prevent your system from receiving the latest updates . If you still wish to disable the file, proceed as follows:
Method 1: Disable the UsoClient.exe file using the Task Scheduler
Although this method is not recommended, it is possible to block the display of the UsoClient.exe pop-up window by using the Task Scheduler.
Here's how to do it:
Step 1: Windows search bar , type: Task Scheduler.
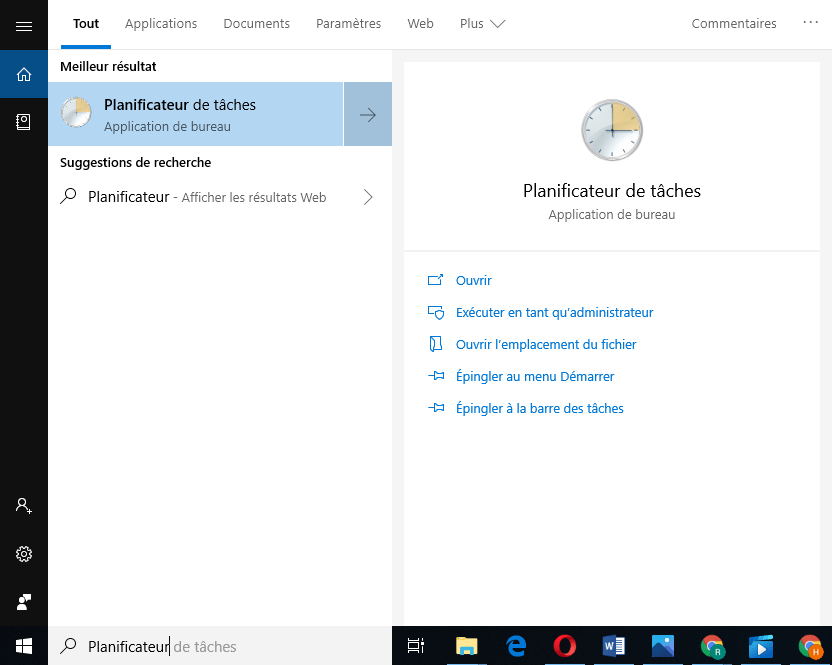
Step 2: Once you access the Task Scheduler, click on the options " Task Scheduler Library" —-》 "Microsoft" —》 " Windows " —》 "UpdateOrchestrator" . For your information, all these options are located in the left pane.
Step 3: After opening the Update Orchestrator folder, click on the central panel and choose the "Schedule analysis"

Step 4: Here, you need to access the right-hand panel and then click on " Disable ". This option is located just below "Selected Item".
Step 5: You have successfully disabled UsoClient! To finalize the operation, you must close the Task Scheduler and then restart your PC.
Upon startup, you will notice that the pop-up window will no longer appear. However, please be aware that if you leave the UsoClient.exe program disabled, you will not be notified of the latest updates available on Windows.
If you wish to reactivate UsoClient from the Task Scheduler, simply follow the same steps and then select the "Enable" option. Restart your computer and voilà, UsoClient and Windows Update will be working again on your computer.
If your computer's version of Windows does not allow you to directly access the Task Scheduler, follow this alternative method to disable the UsoClient.exe file.
Method 2 : Disable the UsoClient.exe program via the Registry Editor
To disable UsoClient via the Registry Editor, you must follow the steps below. Note that disabling UsoClient via the Registry Editor requires creating a 32-bit DWORD value named "NoAutoRebootWithLoggedOnUsers".
Here's how to do it:
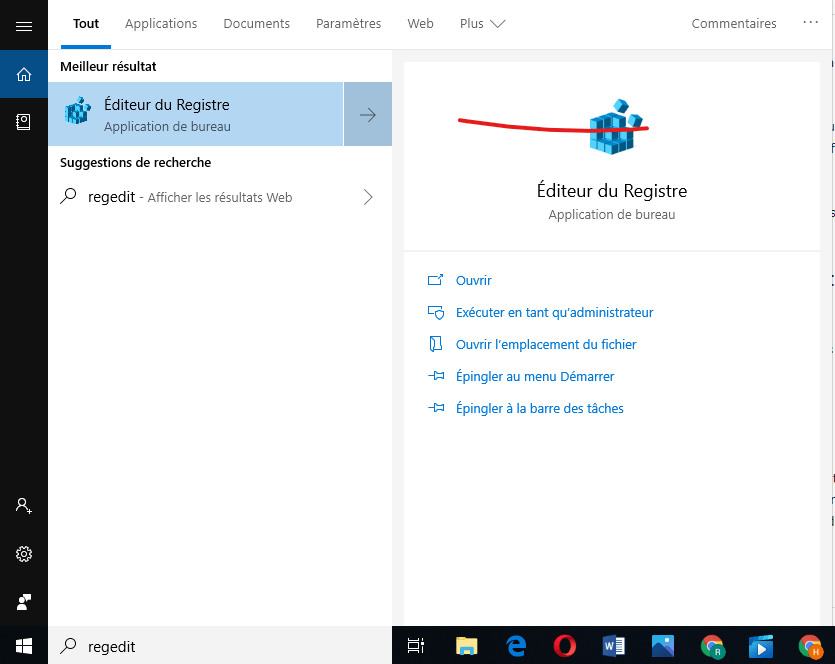
Step 1: Windows search bar , type "regedit" . Alternatively, you can press the Windows + R. This will open a Run dialog box where you can type "regedit" in the search bar. Then, press Enter to open the Registry Editor.
Step 2: Once in the Editor, use the left pane to access the AU folder.
Step 3: Once the AU folder is selected, go to the right pane and then right-click on an empty space. Next, select the "New" >>> "DWORD (32-bit) Value" and rename it to NoAutoRebootWithLoggedOnUsers .

Step 4: Double-click on NoAutoRebootWithLoggedOnUsers and set its value to 1.
Step 5: Next, close the Registry Editor and then restart your computer. The UsoClient.exe file should disappear upon startup.
Was this article helpful? Let us know by leaving a comment!
 to use the Ping command in Windows ?")

