

Just like Windows 10 and all previous versions, installing Windows 11 requires an internet connection . However, there is an unofficial method to bypass this. Let's explore how to install Microsoft's new operating system without an internet connection !
Microsoft opposes installing Windows 11 without an internet connection?

When installing Windows 11 Home on a computer, you will need to connect your PC to the internet and then sign in to your Microsoft account . These are official requirements from Microsoft for installing an operating system on a machine.
Last June, when the first versions of Windows 11 leaked, we witnessed Microsoft blocking the installation process. Indeed, if no internet connection was available on the device, the installation wouldn't work. Obviously, this forced everyone to connect to both the internet and a Microsoft account before any operation could be performed.
Since then, it's been a new game of cat and mouse with Microsoft. Another workaround was discovered some time later, but the ever-vigilant company once again rendered this procedure ineffective. Now, hackers have discovered a new workaround that allows them to install Windows 11 on their PC without an internet connection.
In video format, here's what it looks like:
If this seems very complicated for you, here's how to proceed by following a few simple steps:
Step 1: Start by opening the command prompt with the Shift + F10 combination
When Windows 11 displays a screen prompting you to connect to an internet network to complete the installation, use the keyboard shortcut Shift + F10 or Maj + F10 to bring up the command prompt.
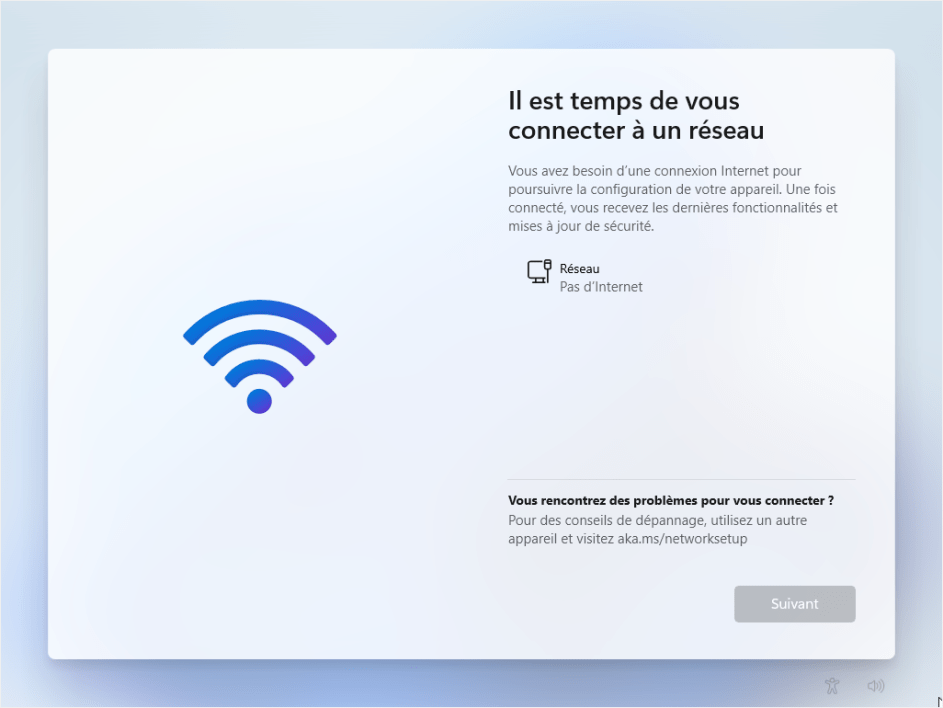
Step 2: Next, prevent your machine from connecting to the Internet
During this step, you must block any connection attempts in order to bypass the no-connection installation.
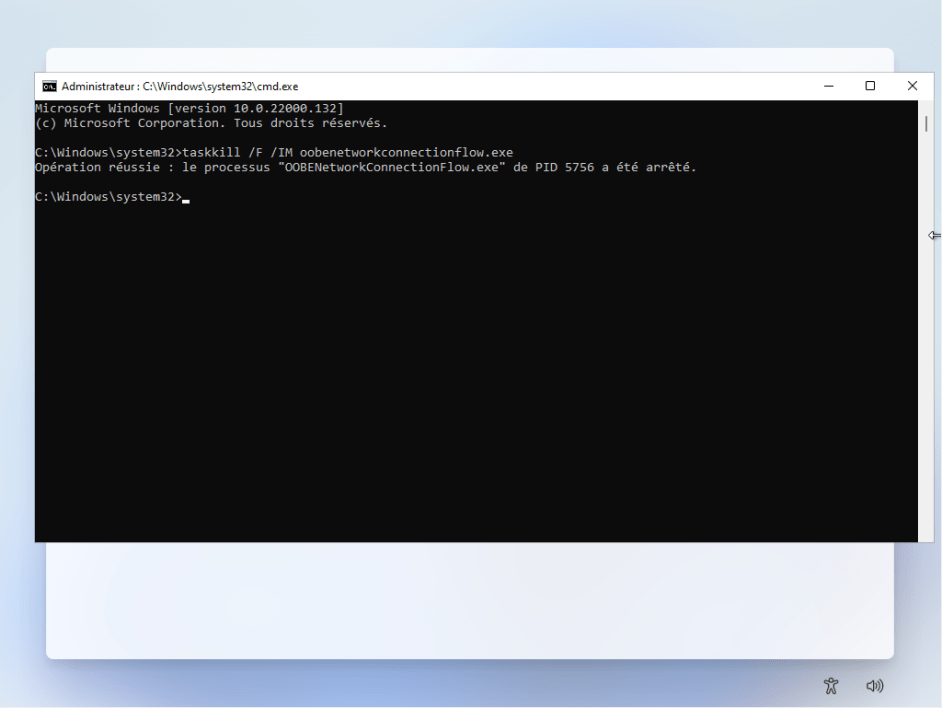
To do this, in the command prompt window that opens, type: taskmgr and press Enter on your keyboard. Alternatively, if that doesn't work, type: taskkill /F /IM oobenetworkconnectionflow.exe and press Enter.
The command prompt will display a message such as: “ Operation successful ”. If you see this, close the command prompt window to complete the installation.
Step 3: Proceed to finalize the Windows 11 installation
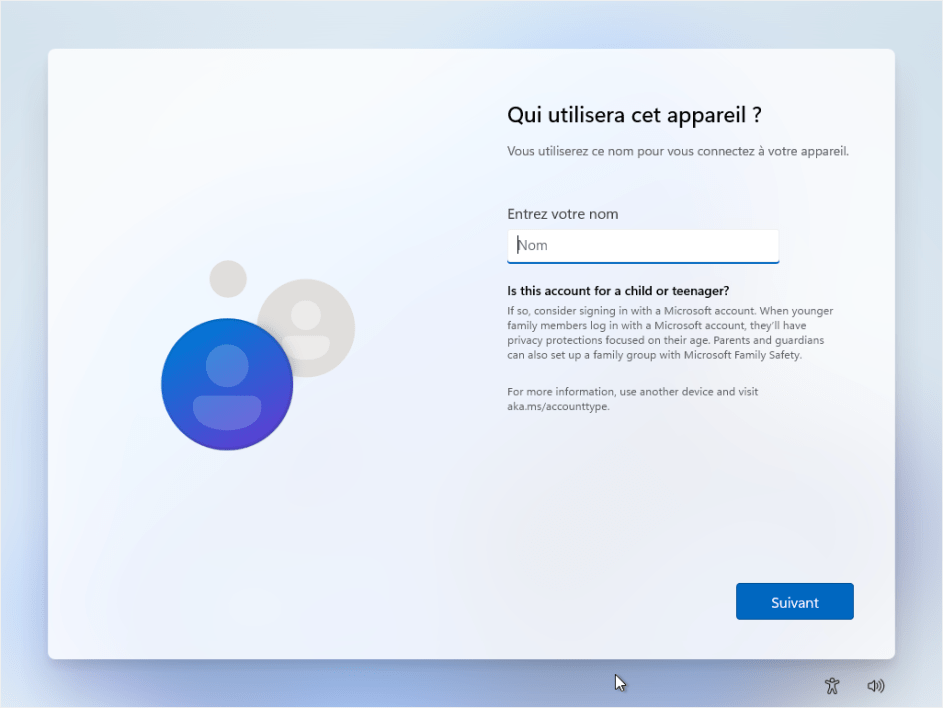
As with the windows 10 installation, the Windows 11 installation assistant will ask you to correctly fill in the personal information of the computer owner.
After completing the process, click “ Next ” to finish installing the new operating system.
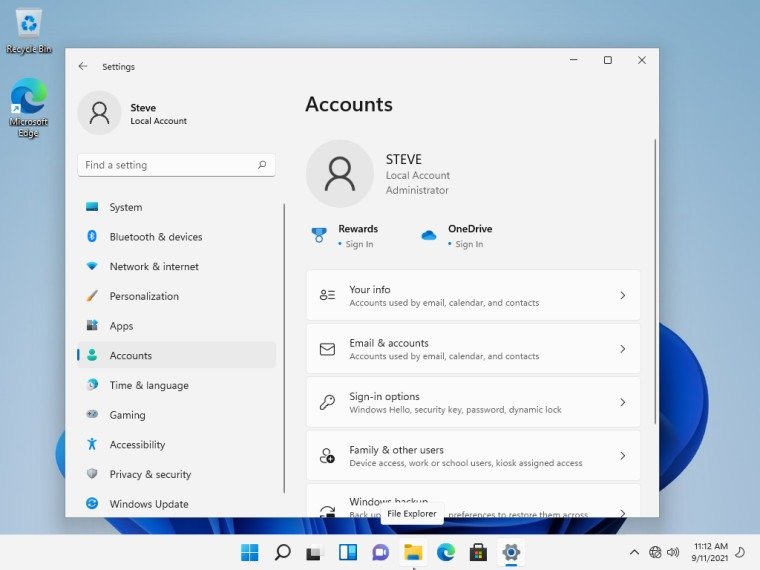
Once the process is complete, you will be transferred from your local account to the Windows 11 desktop.
Next, you can start connecting the computer so that Windows 11 can finish downloading the various missing software components to complete its setup .
One thing is certain! Whether installed with an internet connection or not, Windows 11 will boost your computer's performance .
Source :
 to use the Ping command in Windows ?")

