
")
You have just created an original and high-quality video on CapCut, but you don't know how to export it ?
In this article, we'll explain how to export a CapCut video in just a few clicks, and also how to edit and optimize your videos with this application. Follow the guide!
How to export videos from CapCut
After editing your videos with CapCut , you can export them from the app to save them to your device's memory or share them on social media or sharing platforms . CapCut lets you choose the output format and quality of your videos and manage your exported videos within the app. Here's how:
How to choose the format and output quality of your videos?
Before exporting your videos from CapCut, you can choose the output format and quality of your videos, according to your preferences and needs.
Here's how to do it:
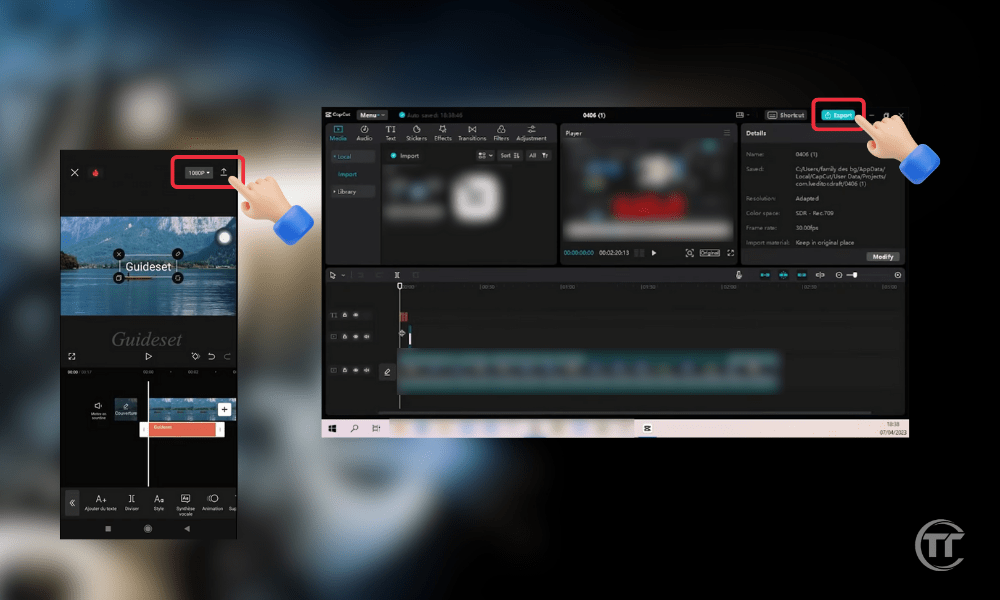
- Press the “Export” button in the top right corner of the screen. A window will appear with export options for your video.
- You can choose the output format of your video, between “MP4" Or "GIF”.
- The “ MP4 ” format is the standard format for videos, which allows you to retain the sound and quality of your video.
- TheGIFis an animated image formatthat allows you to create loops without sound, but with reduced quality.
To choose the output format for your video, tap the "Format" button in the bottom left corner of the screen and select the desired option.
- You can also choose the output quality of your video, between “Weak”, “Average”, “High" Or "PersonalizedThe output quality of your video determines the resolution, the flow rate And the size of your video. The higher the qualityThe sharper and smoother your video is, the more storage space it will take up.
- To choose the output quality of your video, press the “Quality” button in the bottom right corner of the screen, and select the option you want.
- If you choose the “Custom” option, you will be able to manually adjust your video settings, such as resolution, bitrate, framerate, etc.
- Once you have chosen the format and quality for your video, press the “Export” button. Your video will then be ready to be exported from CapCut.
On PC:
On Mobile:
How do I save my videos to my device's memory?
If you want to save your videos to your device's memory, you can easily do so from CapCut.
Here's how to do it:
- On mobile, after choosing the output format and quality for your video, tap the “Export” button in the top right corner of the screen. A progress bar will appear, showing you the time remaining before your video export is complete.
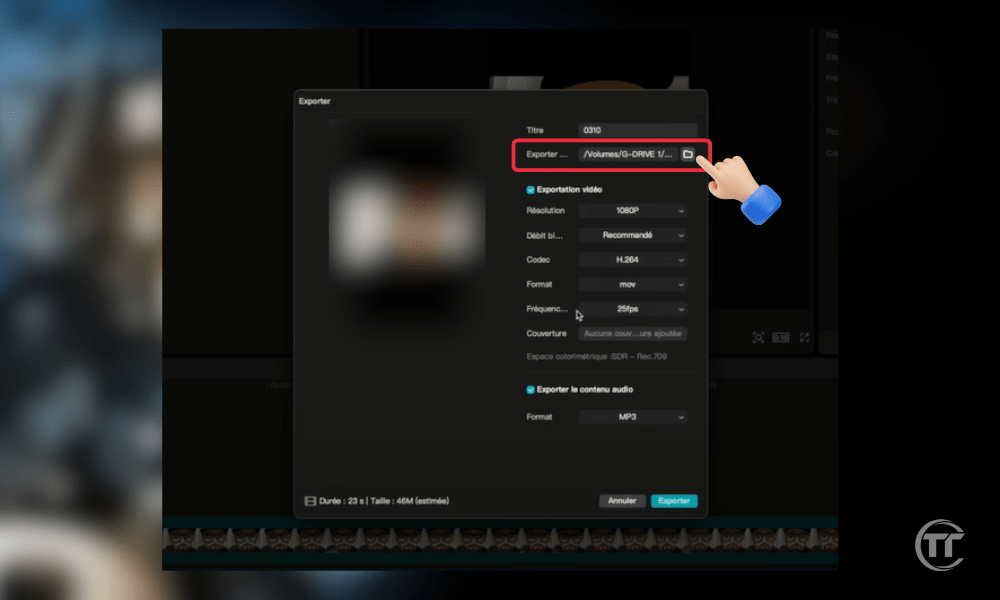
- On PC, you can choose the save location for your video in the video export window.
- When your video export is complete, you will see a message confirming that your video has been saved to your device's memory. You will also be able to see the size and duration of your video.
- You can access your video from your device's gallery, or from the CapCut mobile app, by tapping the "My Videos" button in the top left corner of the screen. You can also edit, delete, or share your video from these apps.
Related article : With CapCut, the creative suite, harness the power of AI for your videos
How to share your videos on social networks or sharing platforms?
If you want to share your videos on social media or sharing platforms, you can do so directly from CapCut. Here's how:
- On mobile only, when your video export is complete, you will see a list of sharing options, such as “TikTok”, “Instagram”, “Facebook”, “YouTube”, etc. You can scroll through the options, or use the search bar at the top of the screen to find the option you want.
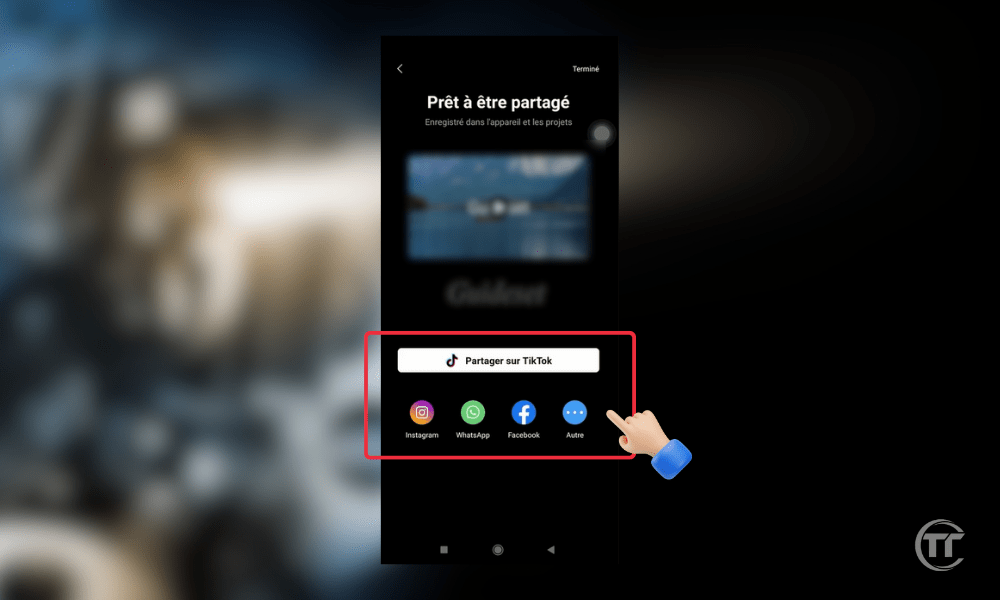
- Tap the sharing option you want, and you'll be redirected to the corresponding app, which will allow you to publish your video on your chosen social network or sharing platform. You can also add a title, description, hashtags, mentions, and more to your video, depending on the app you use.
- When you are finished, press the “Publish” or “Share” button in the application, and your video will be shared on the social network or sharing platform you have chosen.
How do I manage my exported videos in CapCut?
If you want to manage your exported videos in CapCut, you can easily do so from within the application. Here's how:
- On mobile, tap the “My Videos” button in the top left corner of the screen. You will see a list of all the videos you have exported from CapCut, with their name, date, duration, and size.
- You can drag videos to change their order, tap videos to select them, or long press videos to display more options, such as “Edit”, “Delete”, “Share”, “Rename”, etc.
- You can also use the “Sort” button in the top right corner of the screen to sort your videos by name, date, duration, or size.
- When you have finished, press the “Finish” button in the top right corner of the screen.
FAQ
About CapCut
CapCut is a free video editing app , with a Pro version available as a subscription, developed by ByteDance , the company that also owns TikTok , one of the world's most popular video-sharing platforms. CapCut is available for Android , iOS , Windows , and Mac devices . You can download it for free from app stores and directly from their website.
CapCut lets you create high -quality videos with visual effects , transitions , music , text , stickers , and much more . You can use CapCut to make personal , professional , educational , artistic videos , or simply for fun .
How do I import videos from different sources into CapCut?
From your device's gallery:
- Open CapCut and click on “New Project”.
- Select the videos from your gallery that you want to import.
- Click on “Import” to add them to your project.
From the CapCut camera:
- Open CapCut and click on “New Project”.
- Click on “Save” to access the CapCut camera.
- Adjust your recording settings, such as mode, zoom, resolution, etc.
- Press the red to record your video.
- Press “Finish” to add it to your project.
From other applications or sources:
- Open the application or source where the video you want to import is located.
- Select the video and click the Share.
- Search for and click on the “CapCut” option to share it with CapCut.
- The video will be imported into CapCut.
How to export a capcut video without a watermark?
If you want to export a CapCut video without a watermark, you can do so easily and for free from the app. The watermark is the CapCut logo that appears in the bottom right corner of your video, indicating that you used the app to create it.
Here's how to do it:
- After choosing the output format and quality for your video, press the “Export” button in the top right corner of the screen. A window will appear with the export options for your video.
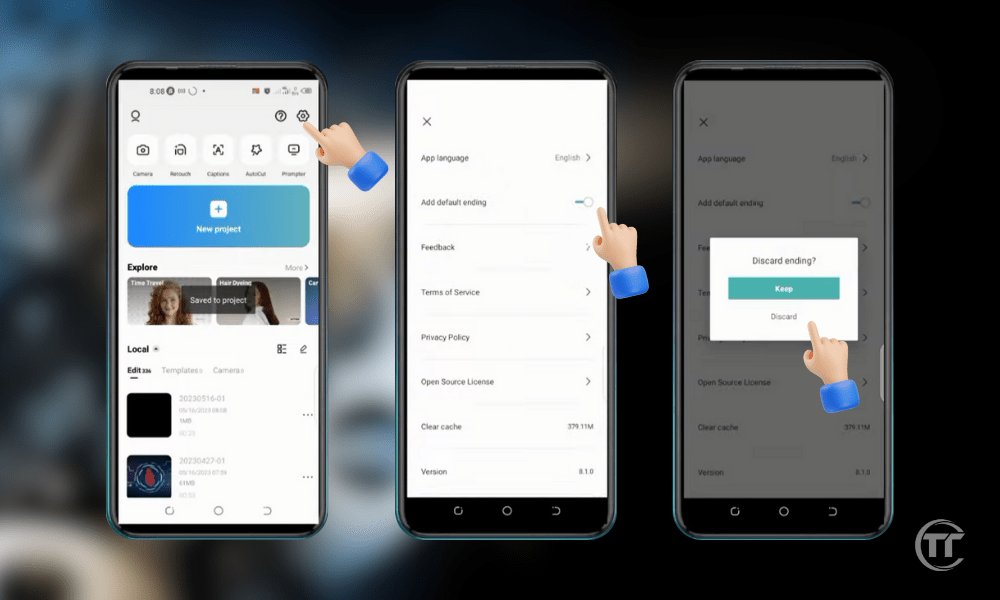
- Click the “ Watermark ” button in the bottom left corner of the window. A switch will appear allowing you to enable or disable the watermark on your video.
- Press the switch to disable the watermark on your video. You will see a message confirming that your video will be exported without a watermark.
- Click the “ Export ” button in the top right corner of the window and wait for your video to finish exporting. Your video will be exported from CapCut without a watermark
Good to know : The 5 best platforms to get views on TikTok!
How to optimize your CapCut videos?
Here are some tips to optimize your CapCut videos:
- Use templates and resources : choose from a variety of ready-made templates and resources, and customize them with your own videos, text, music, etc.
- Improve the quality and stability of your videos : adjust brightness, contrast, saturation, sharpness, blur, etc., and correct shakes and distortions in your videos.
- Synchronize your videos with the rhythm of the music : match the movements and transitions of your videos with the rhythm of the music you have chosen, using auto, manual or custom mode.
- Create special effects with CapCut: add style and dynamism to your videos, using slow motion, fast motion, reverse, mirror, loop, blend, mask, etc.


