

The Photos app is a standard Windows 10 that allows you to view and edit your photos. It's usually installed on your system after the operating system, but it may disappear or stop working correctly. In this case, how do you reinstall it and restore all its functionality? Here are some computer solutions to help you resolve this issue.
Reinstall the Photos app from the Microsoft Store
The first solution is to reinstall the Photos app from the Microsoft Store, Microsoft's online store that offers free and paid apps for Windows 10. Here are the steps to follow:
- Go to the Microsoft Photos on the Microsoft website.
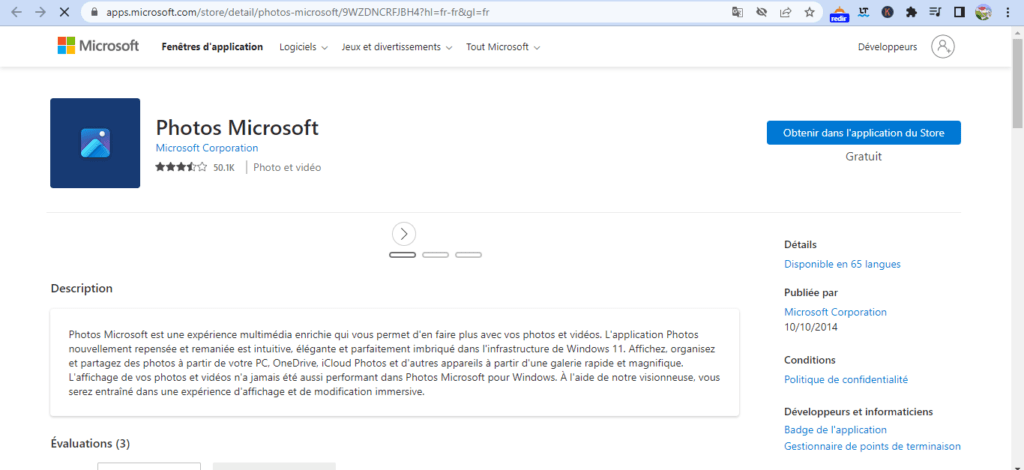
- Click the Get, then click the Install.
- The Photos app will be downloaded and installed on your computer.
Reinstall the Photos app via PowerShell
The second solution involves reinstalling the Photos app via PowerShell, a powerful tool that allows you to run commands and scripts on Windows 10. Here are the steps to follow:
- Open the Start menu, type Windows PowerShell in the search bar.
- Right-click on Windows PowerShell and select Run as administrator.
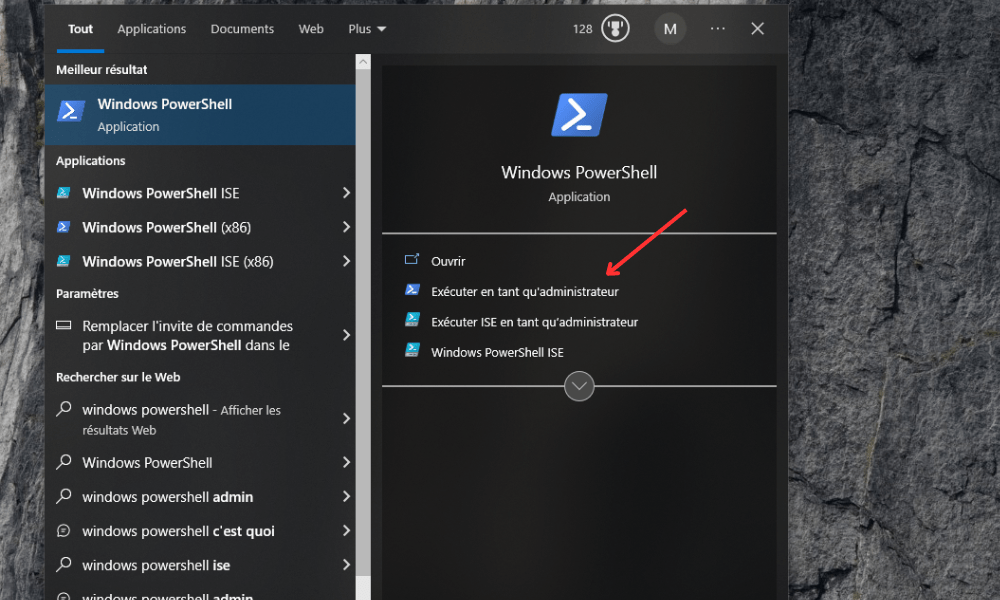
- Enter the command below to reinstall the Photos app and press Enter :
$manifest = (Get-AppxPackageWindowsStore).InstallLocation + '\AppxManifest.xml' Add-AppxPackage -DisableDevelopmentMode -Register $manifest

- The Photos app will be installed on your computer.
Reset the Photos app
If the Photos app is on your computer but isn't working properly, you can try resetting it. This will delete the app's data and settings, but not your photos. Here are the steps:
- Settings Windows via the keyboard shortcut Windows + I, select Apps, then in the list of Apps & features, select the Microsoft Photos app and click on the Advanced options.
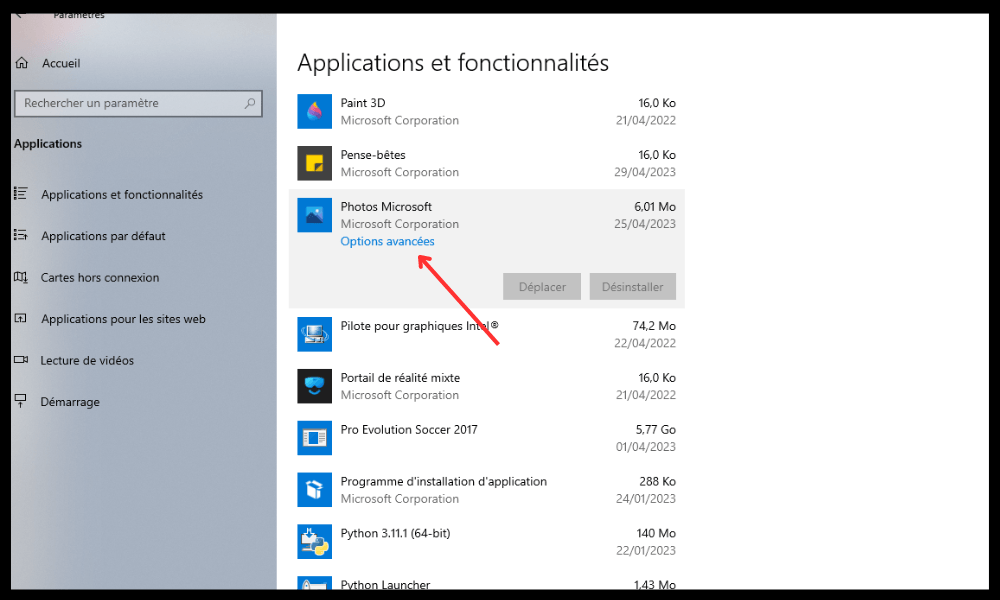
- Click the Reset and confirm your choice.

- The Photos app will be reset.
Run the Windows Store Apps troubleshooter
If none of the previous solutions work, you can try running the Windows Store Apps troubleshooter. This tool will detect and fix problems that might be preventing Windows Store apps from working correctly. Here are the steps to follow:
- Settings Windows via the keyboard shortcut Windows + I, then click on Update & Security, then select Troubleshooting in the left pane and click on the Additional troubleshooting utilities.
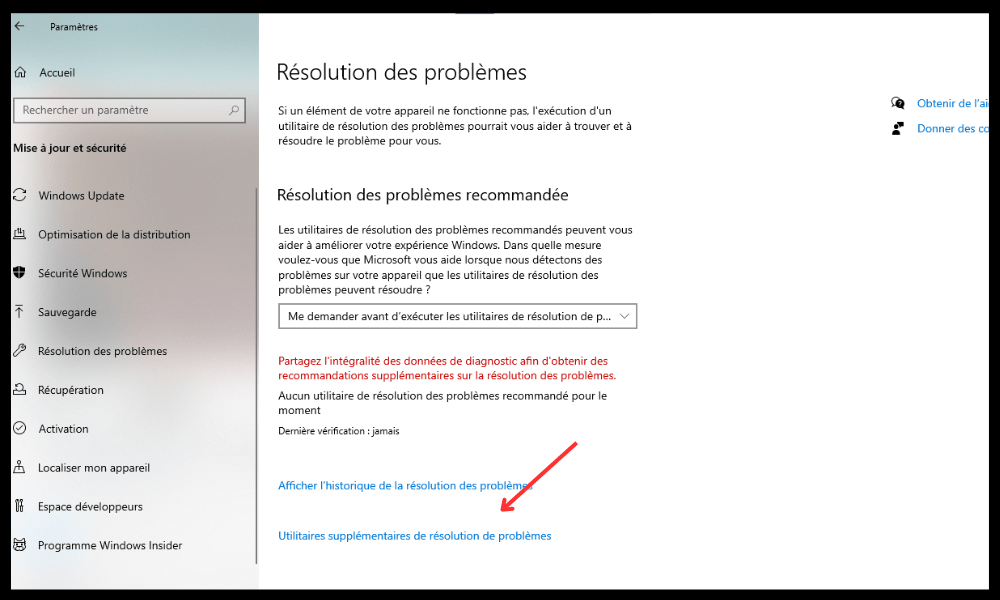
- Under Find and fix other problems, select Apps Windows Store and click the Run the troubleshooter.

- Follow the on-screen instructions to attempt a repair of the Photos app.
FAQ
Here are some frequently asked questions about the Photos app in Windows 10:
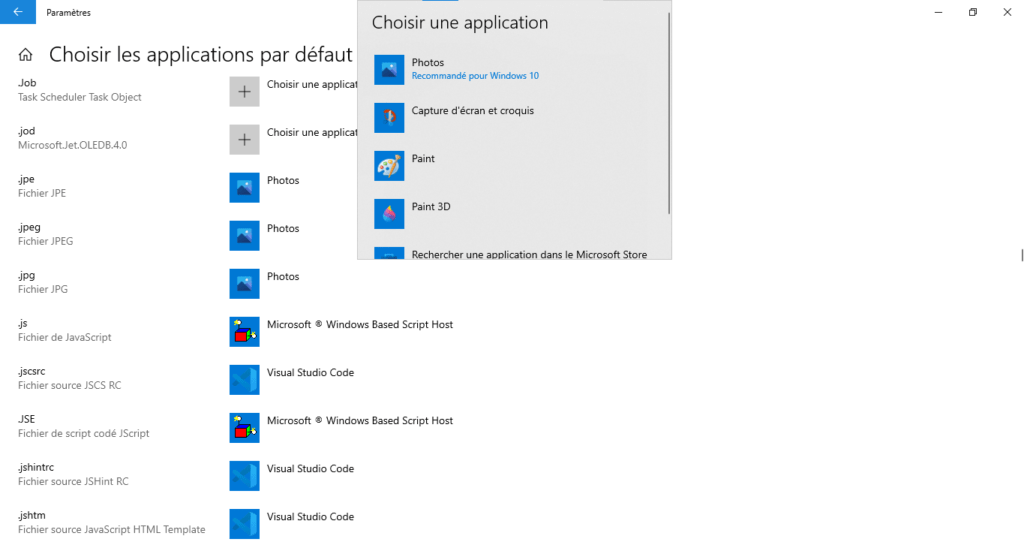
How do I change the default application for opening photos?
To change the default app for opening photos, open Windows using the keyboard shortcut Windows + I, select Apps, and then click Default apps in the left pane. Under Choose default apps by file type, scroll down to find the .jpg and click the current app icon. Then choose the app you want to use to open photos, such as Photos or Paint.
How do I restore the old Windows photo viewer?
To photo viewer Windows, you need to modify the Windows.
We advise you to back up the registry before proceeding with this operation.
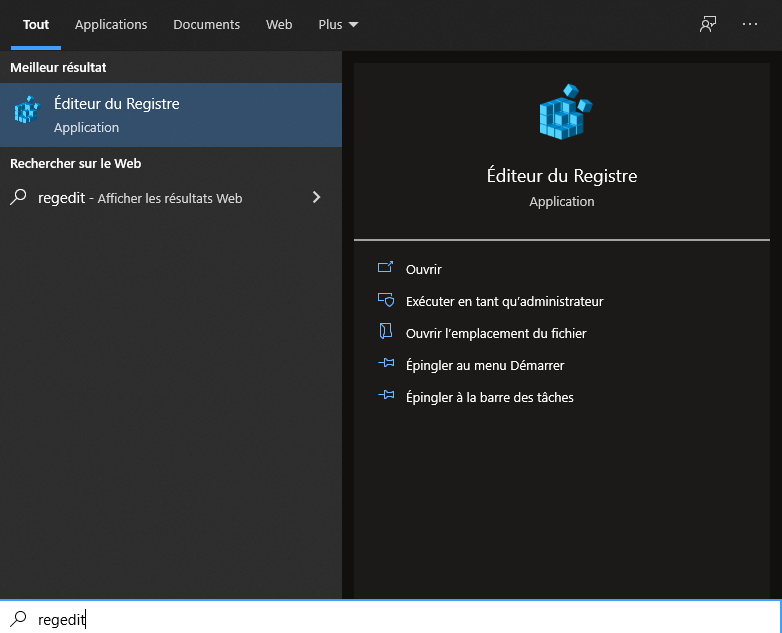
- Open the Start menu, type regedit in the search bar and press Enter.
- Next, access the following key:
HKEY_LOCAL_MACHINE\SOFTWARE\Microsoft\Windows Photo Viewer\Capabilities\FileAssociations - Right-click on the FileAssociations and select New, then String Value.
- Name the value .jpg and double-click on it to edit its data.
- Enter the following value:
PhotoViewer.FileAssoc.TiffRepeat the operation for other photo extensions that you want to associate with the Windows, for example .png, .bmp, etc.
Then close the registry editor and restart your computer.
How to delete duplicate photos on Windows 10?
To remove duplicate photos on Windows 10, you can use specialized software like Duplicate Cleaner or Duplicate Photo Finder. These programs will scan your hard drive and detect identical or similar photos. You can then choose to delete them or move them to another folder.
How to transfer photos from your smartphone to your Windows 10 PC?
To transfer photos from your smartphone to your Windows 10 PC, you have several options:
Using a USB cable : Connect your smartphone to your PC with a USB cable and select file transfer mode on your smartphone. Then open File Explorer on your PC and navigate to the DCIM folder on your smartphone. Select the photos you want to transfer and copy them to the desired folder on your PC.
Using Bluetooth : Enable Bluetooth on both your smartphone and PC and pair them. Select the photos you want to transfer to your smartphone and choose Bluetooth sharing. Then accept the transfer on your PC and choose the destination folder.

Enable automatic photo syncing on your smartphone and wait for them to be uploaded to the cloud. Then open the cloud application on your PC and download the photos you want to transfer.
How do I create a slideshow with the Photos app?
To create a slideshow with the Photos app, follow these steps:
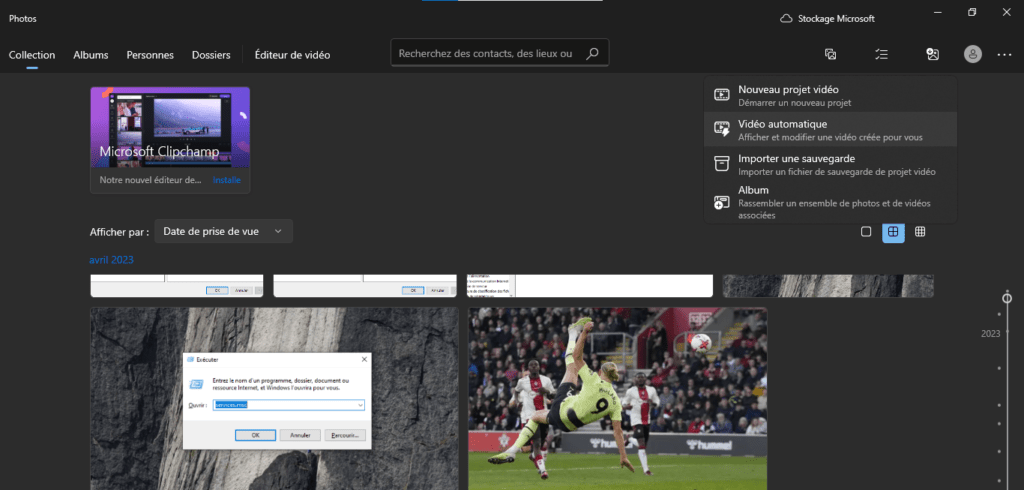
- Open the Photos app and click the Create in the top right corner.
- Choose the Automatic video with music.
- Select the photos you want to include in your slideshow and click the Create.
- Give your slideshow a name and click the OK.
The Photos app will generate a slideshow with transition effects and random music. You can edit the slideshow by clicking the Edit Video.
You can change the music, theme, duration, text and photo order using the various tools provided.
Once you are satisfied with the result, click the Finish video and choose the output quality.
Your slideshow will be saved in the Videos folder on your PC. You can then view it or share it with your family and friends.
Conclusion
The Photos app is a useful application for managing your photos on Windows 10. It allows you to easily view, edit, organize, and share them. You can also zoom in app troubleshooter Windows . We hope this guide has been helpful and that you've been able to regain access to all the features of the Photos app.
 to use the Ping command in Windows ?")

