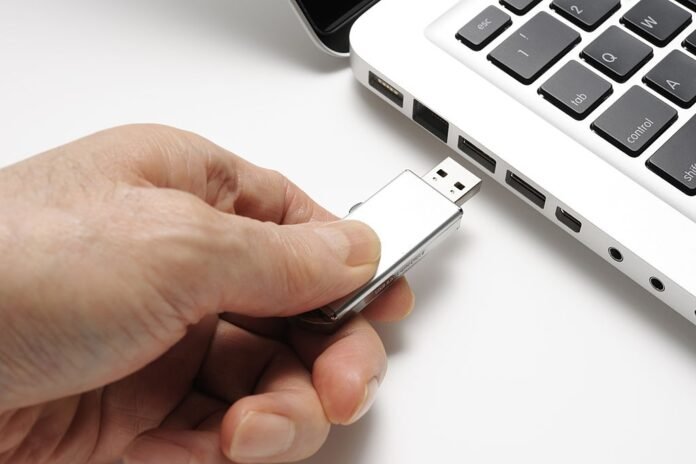
A few years ago, computer data was stored on floppy disks. Then came CDs and DVDs. It was in the 2000s that the USB flash drive appeared, bringing with it many advantages: insensitive to dust and scratches, more compact, and plugging directly into the computer.
Their technologies have been constantly evolving ever since. Once limited to a few megabytes of storage, some now reach 1 terabyte. Their processing speed is also increasingly faster. In short, they have become an indispensable accessory for storing and transferring data to other devices (PCs, printers, stereo systems, televisions, car radios, etc.).
However, sometimes they stop working for no apparent reason. To fix this problem and use it again, formatting your USB drive is the most effective solution . Find our complete tutorial on how to format your USB device under Microsoft Windows and Mac OS X!
Formatting a USB drive in Windows
Formatting a USB drive can serve two purposes: deleting old files to replace them with new ones, or resetting the drive because it's no longer working. If you're using Microsoft's operating system, the steps are now quick and easy. Once you've chosen your preferred file system, simply follow our step-by-step tutorial:
Watch the video below to learn how to format your USB drive on windows 10!
https://www.youtube.com/watch?v=W37x0fondtM
- Connect your USB flash drive to your computer via one of its USB ports.
- Access to " Administration tools There are two ways to do this:
- From File Explorer , paste "Control Panel\System and Security\Administrative Tools" into the address bar to the left of the search bar and press Enter.
- OR
- Open the start menu and search for " Control Panel "
- Go to " Administration Tools "
- In the new window that opens, double-click on " Computer Management "
- Click on " Disk Management " located in " Storage " to see information about all your connected drives (internal hard drives, external hard drives, USB flash drives and MicroSD cards)
- Once you have identified your USB drive, right-click on its name, then press " Format… then confirm with the " button OK ».
- If you are still unable to identify which USB drive you need to format, go to a File Explorer
- Then go to " Desktop " > " This PC " > and select one by one the tabs containing a letter followed by two dots enclosed in parentheses, such as "(C:)" or "(D:)"
Do you find this difficult? We invite you to read on!
How to easily format your USB drive under Windows with EaseUS USB drive formatting software!

If you're having trouble formatting your USB drive on windows 10, we highly recommend using EaseUS Partition Master software!
This partition software allows you to format a USB drive simply and in just a few clicks !
With EaseUS Partition Master, here's what you can do:
- You can format a USB flash drive up to 128 GB in FAT32
- Convert a USB drive from FAT32 to NTFS without formatting!
- Format a USB drive to fix the "File too large for the destination file system" error.
- Format a USB drive as EXT2/3/4, FAT16/32, NTFS, exFAT
Are you interested in this software? We invite you to download the free software EaseUS Partition Master Free to easily format your USB drive.
Follow the tutorial below to use the software!
Step 1.
Launch EaseUS Partition Master, right-click on the partition of your external hard drive/USB/SD card that you want to format and choose the "Format" option.

Step 2
Assign a new partition label, a new file system (NTFS / FAT32 / EXT2 / EXT3) and a new cluster size to the selected partition, then click "OK".

Step 3
A warning window will appear stating "The data on the target partition will be erased." Click "OK" to continue.

Step 4
Click the "Run Operation" button in the upper left corner to review the changes, then click "Apply" to begin formatting your external hard drive/USB/SD card.

There you go, you've just formatted your USB drive in just a few clicks. As you've seen, EaseUS Partition Master is easy to use!
Formatting a USB drive under Mac OS X
The steps on macOS are different from the Windowsversion. To format your USB drive on a Mac, follow these step-by-step instructions:
We suggest you watch the video first to get a clearer understanding!
- Connect your key via a USB port
- Access " Disk Utility "Through one of these methods:"
- Search using Spotlight (Cmd + Space) for " Disk Utility "
- From Launchpad , in the " Other " folder, then via the "Disk Utility" application
- From the Finder , in the sidebar, open the " Applications " folder, then the " Utilities " folder, and launch " Disk Utility ".
- In the sidebar, select the disk or USB drive you want to format
- Click Erase, then configure the formatting in the window that opens. The default format for the selected device will be "Mac OS Extended (Journaled)." This means your device will only be usable on a Mac. If you want to maintain flexibility in using the device, choose MS-DOS (FAT32) or ExFAT formats . These will allow you to use the device on Windows , macOS, or other devices.
- Enter a new name and then confirm the formatting by pressing " Delete " in the bottom right corner of the popup.
How to recover your files after formatting your USB drive?
If you accidentally formatted your USB drive or lost important files due to a crash, virus, or accidental deletion, don't despair. There's an effective and reliable solution to recover your data: CleverFiles' Disk Drill software.
Disk Drill is a recovery tool for recovering formatted USB drives that can restore any type of data from any storage media, including USB drives, memory cards, internal and external hard drives, etc.
Disk Drill is compatible with Windows and macOS, and it's very easy to use. Simply download the software from the official CleverFiles website, install it on your computer, plug in your USB drive, and start the scan. Disk Drill will analyze your USB drive and display all recoverable files, which you can preview and select.
Namely: the FAT16, FAT32 and NTFS file systems
There are different USB flash drive formatting systems, each with a specific use:
- FAT16: limited to 2 GB
Minimum version required: all versions of Windows via MS-DOS
File size limited to: 2 GB.
- FAT32: the preferred format for multimedia drives
Minimum version required: Windows 95 OSR2 or later
File size limited to: 4 GB.
- NTFS: for large files larger than 4 GB
Minimum version required: Windows NT 4 and above
File size is limited to 16 exbibityes, which is essentially "unlimited". If you don't know how much 16 exbibityes is, compare it in terabytes on Google (spoiler alert: it's a lot)
For your information, FAT stands for File Allocation Table. It's an index that lists all the contents of a disk , in order to record the location of the files.
You can now get an idea of the type of system you will need to use.
Frequently Asked Questions about Formatting

What is a musical score?
A partition is also called a volume. These are independent sections of storage space available on your device (hard drive, memory card, SD card, USB drive, etc.). Partitions allow you to divide your storage into several parts , giving you the option to format them separately.
How do I format a hard drive?
The steps to format a hard drive are the same as for formatting a USB flash drive. Whether it's an external hard drive or the one in your PC, you need to go to " Disk Management " on Windows or " Disk Utility " on macOS. This type of storage device generally has a larger capacity than USB flash drives. That's why formatting as NTFS is the recommended option , since the volume is larger than 4 GB.
Can the data be recovered?
Data recovery will depend on the condition of your USB drive or hard drive. If it is corrupted and your data is inaccessible due to a virus or if the device was disconnected without being ejected, it is very likely that your data is unrecoverable. However, some professionals are able to recover it .
My USB drive is read-only, what should I do?
To unlock the read-only feature of your USB drive, you can either:
- Change the latch position to “ Hold ” if it is currently in “Locked”
- Flash your USB drive to its factory settings. To do this, search on Google: flash USB drive “brand name” “model name” “storage capacity” . Install the manufacturer's software and follow the instructions. Be aware that this will also erase your data, making your drive completely blank .
- via the registry editor.
- Press the Windows key + R
- type “ regedit ” and then press OK.
- Access "HKEY_LOCAL_MACHINE\System\CurrentControlSet\Control\StorageDevicePolicies" by searching using Ctrl+F or follow each path in the sidebar


