

Windows uses a data store called the Boot Code (BCD) to manage the applications and settings that launch at startup. The BCD replaces the Boot.ini file of older versions of Windows and offers more customization and troubleshooting options. BCDEdit is a command-line tool that allows you to access and modify the BCD. It is included with Windows Vista and later versions. BCDEdit is used to create, delete, modify, or copy BCD entries, as well as to enable or disable certain startup options, such as Safe Mode or Boot Logging.
In this article, we'll show you how to use bcdedit to modify Windowsstartup. We'll cover basic commands, BCD entry identifiers, data types, and possible values. We'll also provide some examples of common uses for bcdedit to troubleshoot or optimize Windowsstartup.
How do I access bcdedit?
To use bcdedit, you must have administrative privileges on your computer. You must also open a command prompt as an administrator.
- Click on the Start menu and type cmd in the search box.
Right-click on Command Prompt and choose Run as administrator. 
Type bcdedit /? to display the list of available commands
- For detailed help on a particular command, type bcdedit /?<commande> , Or<commande> is the name of the command you want to view. For example, bcdedit /?createstore displays detailed help for the createstore command.
How do I list the entries in the BCD?

To list the BCD entries, you can use the command `bcdedit /enum`. This command displays the following information for each entry:
- The identifier: This is a unique code that identifies the entry. It can be in the form {XXXX-XXXX-XXXX-XXXX}, where XXXX are hexadecimal digits, or in the form {name}, where name is a standard name defined by Windows. The most common standard identifiers are:
- {bootmgr}Windows This corresponds to the Windows Boot Manager, which displays the boot menu and loads the selected OS.
- {current}: This corresponds to the OS selected when Windowsstarts.
- {default}: This corresponds to the OS selected by default when Windowsstarts.
- {ntldr}: it corresponds to an OS in ntldr (Windows Legacy OS Loader), for example Windows XP.
- Device type: This indicates whether the entry corresponds to a physical device (partition) or a logical device (file).
- The path: it indicates the path to the executable file or boot sector associated with the entry.
- Options: These are additional parameters that modify the behavior of the entry. For example, description allows you to change the name displayed in the startup menu, timeout allows you to change the waiting time before automatic startup, etc.
You can also use the bcdedit /v command to display more detailed information about BCD entries, such as creation date, modification date, or GUID.
How do I create a new entry in the BCD?
To create a new entry in the BCD, you can use the command `bcdedit /create`. This command creates an entry with a randomly generated identifier and a specified application type. The application type can be one of the following:
- {bootmgr}: to create a boot manager entry.
- {memdiag}: to create a memory diagnostic tool type entry.
- {ntldr}: to create an OS loader entry in ntldr.
- {legacy}: to create an OS loader entry in legacy mode.
- {resume}: to create a resume entry after hibernation.
- {emssettings}: to create an entry of type emergency service settings.
- {badmemory}: to create an entry of type list of faulty memory addresses.
- {dbgsettings}: to create an entry of type debug settings.
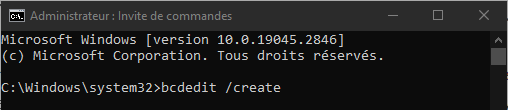
For example, to create an OS loader entry in ntldr, you can type the following command:
bcdedit /create /d “Windows XP” /ntldr application
This command displays the generated identifier for the new entry, for example {cbd971bf-b7b8-4885-951a-fa03044f5d71}. You can then use this identifier to modify other parameters of the entry, such as the path or options.
How do I modify an existing entry in the BCD?

To modify an existing entry in the BCD, you can use the `bcdedit /set` command. This command allows you to change the value of a data type for an entry specified by its identifier. The data type can be one of the following:
- device: to change the type of device associated with the input.
- path: to change the path to the executable file or boot sector associated with the entry.
- Description: To change the name displayed in the startup menu for the entry.
- locale: to change the language used for input.
- inherit: to make the input inherit the parameters of another input.
- recoverysequence: to specify the identifier of an entry to use in case of a boot failure.
- recoveryenabled: to enable or disable automatic recovery in case of boot failure.
- osdevice: to change the device type containing the OS system files associated with the entry.
- systemroot: to change the path to the OS root folder associated with the entry.
- resumeobject: to specify the identifier of an entry of type resume after hibernation.
- nx: to enable or disable Data Execution Protection (DEP) for the input.
- pae: to enable or disable the Physical Address Extension (PAE) for the input.
- detecthal: to enable or disable automatic equipment detection (HAL) for entry.
- winpe: to indicate if the entry corresponds to a Windows PE (pre-installation) environment.
- ems: to activate or deactivate the emergency medical services (EMS) for the entrance.
- debug: to enable or disable debug mode for the input.
- debugtype: to specify the type of debugging to use for the input (serial, 1394 or usb).
- debugport: to specify the serial port to use for serial port debugging.
- baudrate: to specify the baud rate to use for serial port debugging.
- 1394channel: to specify the channel to use for debugging via IEEE port 1394.
- usbbusparams: to specify the USB bus parameters to use for USB port debugging.
- SOS: to enable or disable the display of driver information during startup.
- bootlog: to enable or disable boot logging in the file %WINDIR%\ntbtlog.txt.
- nocrashautoreboot: to disable automatic restart in case of a blue screen.
- usefirmwarepcisettings: to use the PCI settings from the firmware instead of Windowssettings.
- groupsize: to specify the size of the processor group for parallel booting.
- groupaware: to enable or disable the consideration of the processor group during parallel boot.
- numproc: to specify the number of processors to use for startup.
- truncatememory: to specify the maximum amount of memory to use for booting.
- removememory: to specify the amount of memory to remove for startup.
- increaseuserva: to increase the amount of virtual memory addressable by user-mode applications.
- testsigning: to enable or disable the loading of digitally unsigned drivers.
- nointegritychecks: to enable or disable the integrity checking of digitally signed drivers.
- loadoptions: to specify the load options to pass to the OS loader.
- hypervisorlaunchtype: to enable or disable the hypervisor launch at startup.
- hypervisordebugtype: to specify the type of debugging to use for the hypervisor (serial, 1394 or usb).
- hypervisordebugport: to specify the serial port to use for debugging the hypervisor via serial port.
- hypervisorbaudrate: to specify the baud rate to use for debugging the hypervisor via serial port.
- hypervisorchannel: to specify the channel to use for hypervisor debugging via IEEE 1394 port.
- hypervisorusbbusparams: to specify the USB bus parameters to use for debugging the hypervisor via USB port.
- bootstatuspolicy: to specify the policy to apply in case of failure of the previous boot (ignoreallfailures, ignoreshutdownfailures, displayallfailures or rebootonfailure).
- bootems: to enable or disable emergency redirection (EMS) during startup.
To modify an entry using the bcdedit /set command, you must specify the entry's identifier, the type of data to modify, and the value to assign. For example, to change the name displayed in the startup menu for the {current} entry, you can type the following command:
bcdedit /set {current} description “Windows 10”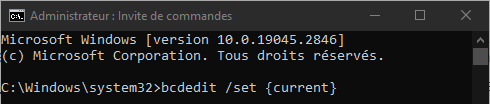
You can also use the standard identifiers {bootmgr}, {default}, or {ntldr} instead of randomly generated identifiers if you know the type of entry you want to modify. For example, to change the wait time before the boot manager starts automatically, you can type the following command:
bcdedit /set {bootmgr} timeout 10
How do I delete an entry from the BCD?

To delete an entry from the BCD, you can use the command `bcdedit /delete`. This command deletes the entry specified by its identifier, as well as all dependent entries. For example, to delete the entry `{cbd971bf-b7b8-4885-951a-fa03044f5d71}` that we created earlier, you can type the following command:
bcdedit /delete {cbd971bf-b7b8-4885-951a-fa03044f5d71}
You can also use the /cleanup option to remove all orphaned entries from the BCD, that is, entries that are not referenced by the boot manager or an OS entry. For example, to remove all orphaned entries from the BCD, you can type the following command:
bcdedit /delete /cleanup
How do I copy an entry from the BCD?
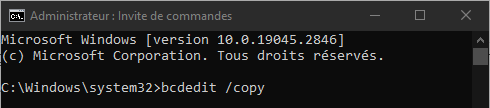
To copy a BCD entry, you can use the `bcdedit /copy` command. This command creates a new entry with the same parameters as the specified entry's identifier, but with a new, randomly generated identifier. You can then modify the parameters of the new entry as needed. For example, to copy the entry `{current}` and give it a new name, you can type the following commands:
bcdedit /copy {current} /d “Windows 10 – Copy” bcdedit /set {ID} description “Windows 10 – Copy”
Where {ID} is the generated identifier for the new entry.
How to restore the BCD to its original state?
If you have modified the BCD and are experiencing boot problems, you can restore the BCD to its original state using the `bcdedit /import` command. This command restores the system store contents from a backup file previously generated with the `bcdedit /export` command. This command removes all existing entries from the system store prior to the import.
For example, if you created a BCD backup file named backup.bcd in the C:\ folder, you can restore the BCD from this file by typing the following command:
bcdedit /import C:\backup.bcd

.
FAQ
What is the difference between bcdedit and bootrec?
BCDEdit is a tool that allows you to modify the contents of the BCD, while bootrec is a tool that allows you to repair Windows startup in case of BCD or boot sector corruption. Bootrec uses bcdedit internally to rebuild the BCD.
How can I access bcdedit if Windows won't start?
If Windows fails to start, you can access bcdedit using Windows installation media (DVD or USB drive) or a system repair disc. You must then select the "Repair your computer" option and access the command prompt.
How to create a dual-boot system using bcdedit?
To create a dual-boot system with bcdedit, you need two partitions, each containing a BCD-compatible operating system (Windows Vista or later). You then need to create a BCD entry for each operating system, specifying the device type, path, and appropriate options. You can also modify the {bootmgr} entry to change the default operating system or the timeout before automatic boot.
How to remove a dual-boot using bcdedit?
To remove a dual-boot using bcdedit, you must delete the entry corresponding to the OS you no longer want to use from the BCD, along with all dependent entries. You must also modify the {bootmgr} entry to change the default OS if necessary. You can then format or delete the partition containing the removed OS.
How do I activate safe mode using bcdedit?
Safe Mode is a startup option that allows Windows with a limited set of drivers and services. It is useful for diagnosing and resolving startup or stability issues. To enable Safe Mode with bcdedit, you need to modify the entry corresponding to the OS you want to boot into Safe Mode by adding the safeboot option with the value minimal, network, or dsrepair, depending on the type of Safe Mode you want to use. For example, to enable minimal Safe Mode for the {current} entry, you can type the following command:
bcdedit /set {current} safeboot minimal
To disable safe mode, you must remove the safeboot option from the entry. For example, to disable safe mode for the {current} entry, you can type the following command:
bcdedit /deletevalue {current} safeboot
Conclusion
BCDEdit is a powerful and flexible tool for modifying the Windows . It allows you to create, delete, modify, or copy BCD entries, as well as enable or disable certain startup options. It is useful for troubleshooting startup problems, optimizing system performance, or creating custom configurations. However, BCDEdit is also a complex and potentially dangerous tool. Caution is advised when using it, and you must fully understand the consequences of any changes made to the BCD. It is recommended to back up your BCD before modifying it and to refer to Microsoft's official documentation for more details on commands, identifiers, data types, and possible values. If you experience difficulties booting your PC after modifying the BCD, you can try resetting your PC's BIOS using Clear CMOS .


