

A few years ago, the integration of webcams into laptops for video calls and meetings was a major innovation. Today, almost all laptops come equipped with them, including Macs. These webcams on Macs are generally used for video conferencing, but they can also take photos. Many users wonder how to take a picture on a Mac, and some don't even know that a camera app exists for Mac.
This post is published to solve this problem for Mac users. In this article, EaseUS will help you find the camera application on your Mac and provide details on how to take a screenshot on a Mac.
How to take a picture with a camera
Before we get to the main question—how to take a picture on a Mac—let's start by finding the camera app. While you can use third-party apps to take pictures on a Mac, it's always best to use Apple's native camera app. The built-in camera app on Mac is called Photo Booth. You can also use this app to record yourself on your Mac.
The stepsto take a screenshot on a Mac are shown below:
Step 1. Open Finder on your Mac, then go to the Applications. Scroll down to see Photo Booth.
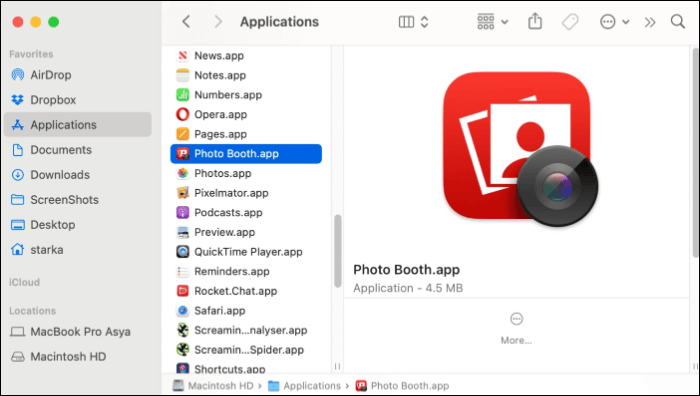
Step 2. Open the Photo Booth to view the webcam image. You can also open the Photo Booth app from Launchpad or Spotlight search. Your Mac's webcam will automatically activate, and a green light next to it will indicate this.
Step 3. You have two options: You can take a single photo or click on four consecutive photos. Select your choice in the bottom left corner.
Step 4. Once you are ready, click the camera buttonto take a picture using the webcam.

Step 5. The webcam will take a picture after three seconds. You can see the picture at the bottom of the application screen. Now, right-click > Export > Give it a name and location > Save to save your picture.
How to take a screenshot on a Macbook Air/Pro
A quick screenshot of what's on your screen is very useful. Taking a screenshot can be a lifesaver if you're on a video conference, following a tutorial, or in an important meeting.
Apple laptops also have keyboard shortcuts that allow users to take screenshots. Let's see how to take a screenshot on a MacBook Air/Pro. All Apple laptops, not just the MacBook Air/Pro, have the same screenshot shortcuts. Therefore, you can use the same ones on any modern Mac.
1. Screenshot of an entire screen
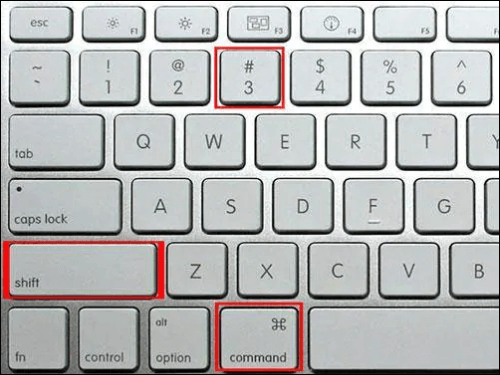
The keyboard shortcut to take a screenshot of the entire screen is Cmd + Shift + 3.
2. Screenshot of part of the screen
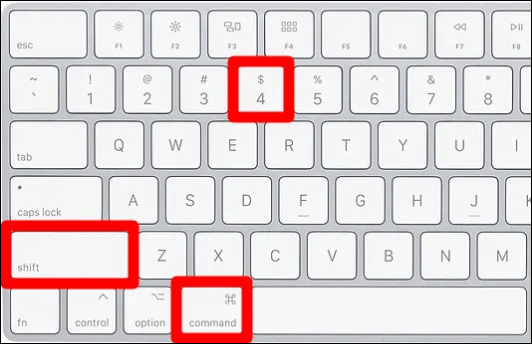
To take a screenshot of a selected area of the screen, use the keyboard shortcut Cmd + Shift + 4. This key combination changes the cursor to a crosshair. You can then drag this crosshair to select and capture a portion of your screen. After selecting the area, release the mouse button or touchpad to take the screenshot.
The Cmd + Shift + 4 combination offers a few additional options to help users.
- 1️⃣ Press and release the space bar: the crosshair will change into a small camera icon, which can hover over any open window. Select the window you want to capture and take a picture. A screenshot taken using this combination will have a white border and shadow effects.
- 2️⃣ Press and hold the spacebar: this action locks the capture area but also allows you to reposition the area you want to capture. It's very useful to modify your initial selection areas by holding down the spacebar and repositioning the borders (after dragging the crosshair to highlight the area, but before releasing the mouse or trackpad button).
- 3️⃣ Hold the Shift key: (after dragging the crosshair to highlight the area, but before releasing the mouse button or touchpad). This action locks each side of the selection area we created earlier and allows you to move your cursor up and down to position the bottom edge.
3. Screenshot of the touch bar
If your MacBook Pro has a Touch Bar, macOS lets you take a screenshot of what's currently displayed on the Touch Bar. Press Cmd + Shift + 6 to take a screenshot of your Touch Bar.
However, Apple previously offered a single command to take a screenshot of the entire screen, a window, or a portion of the screen. The shortcut was Cmd + Shift + 5, present in macOS Mojave. It displays a small panel containing all the options.
Pro tip: How to record videos on a Macbook Air/Pro
If you weren't aware, the MacBook also has a built-in video recorder, but it lacks features for editing and modifying video. Especially if you're a gamer or a teacher, creating professional-quality videos becomes very difficult. There are very few third-party applications that facilitate screen recording and offer editing options to improve the final result.
EaseUS RecExperts for Mac, a spectacular screen recorder for Mac, lets you create high-quality screen recordings with HD resolution and high frame rates. If you're a gamer or educator, you can even record your screen with your webcam and microphone audio for YouTube and social media. The application allows you to record the entire screen, a selected area, or multiple screens simultaneously. This professional software is well-equipped with excellent features to meet all your screen recording needs.
Key features of EaseUS RecExperts:
- Record your screen using a webcam, system audio, and a microphone
- Users can record HD videos at up to 60 fps
- Allows users to automatically start and stop recordings and to schedule them.
- You can benefit from 13 export options, including the most common formats.
- Option to record the screen with sound
Here's a guide to recording your screen on your Mac with EaseUS RecExperts for Mac:
Step 1. Select the recording area
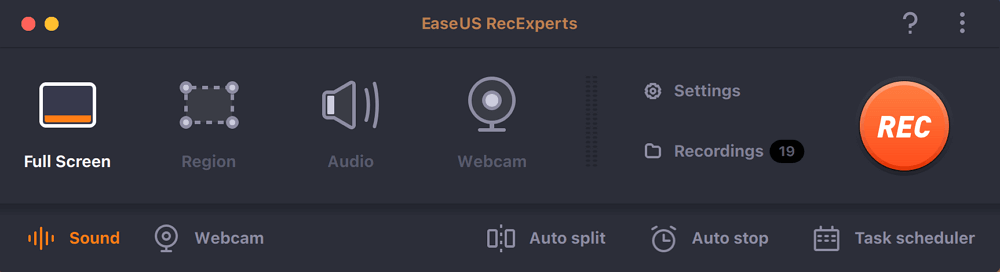
Launch this program on your Mac, then click on "Full Screen" or "Region" to select the recording area on your desktop.
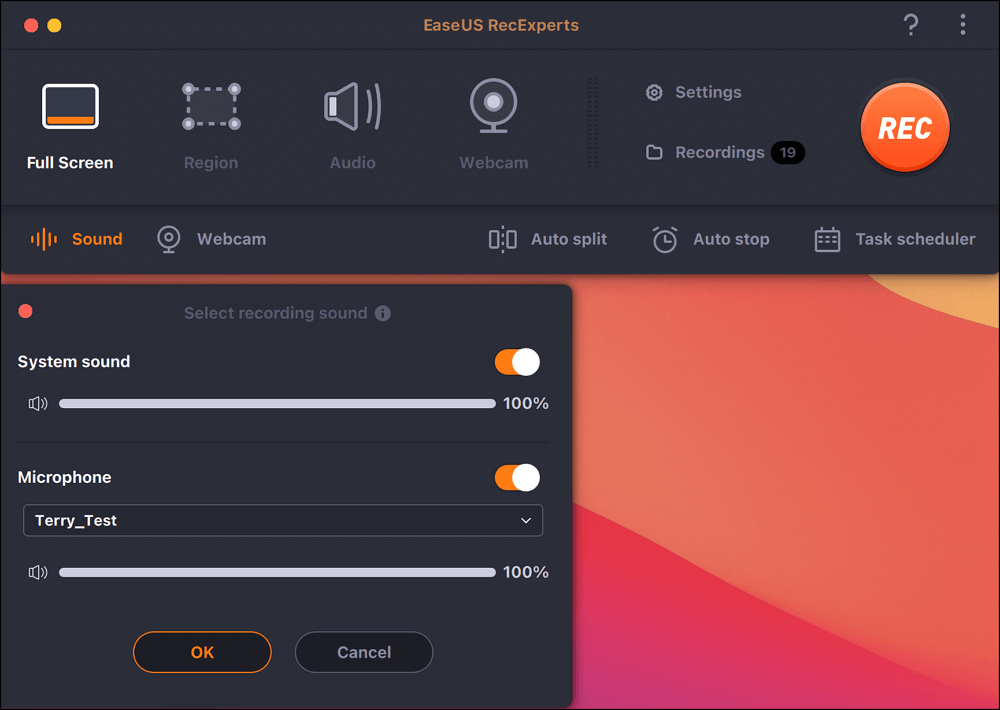
Step 2. Choose the audio source/webcam
Click the "Sound" icon in the bottom left of the panel to select the sound you want to capture along with the screen. If needed, you can add a webcam to your recording by clicking the "Webcam" icon next to "Sound".
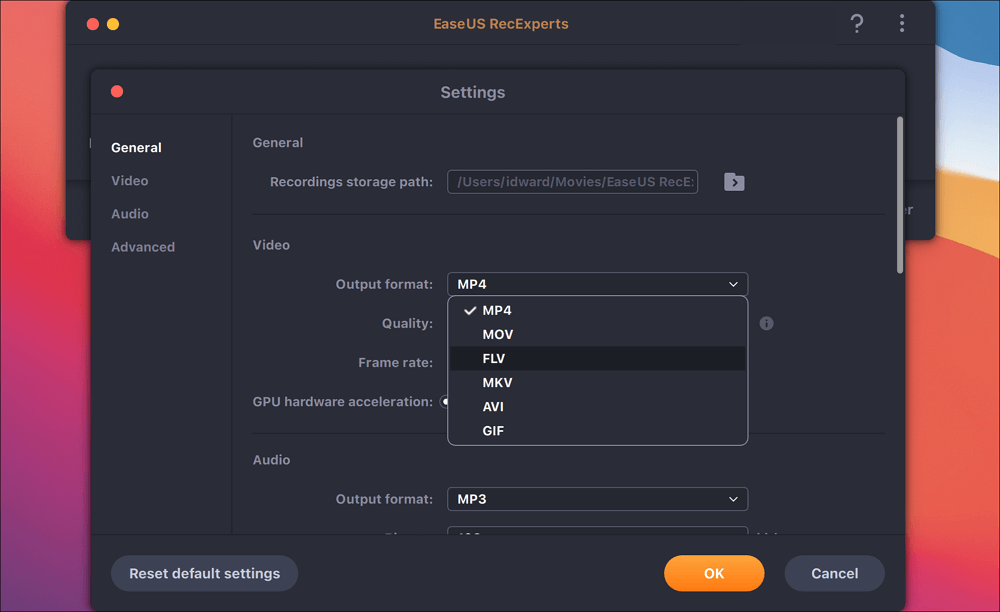
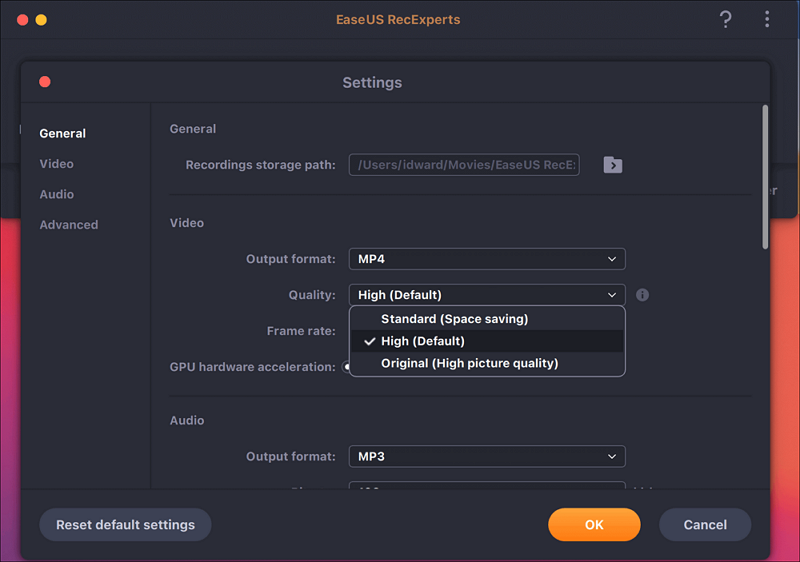
Step 3. Adjust the output settings
Depending on your needs, click the "Settings" button in the panel to choose the output format, quality, location, shortcuts, etc.
Step 4. Start recording
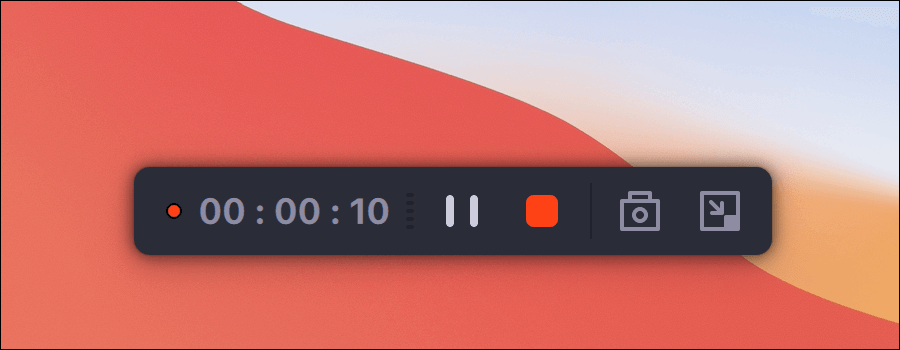
Once all the settings are configured, return to the main interface and click "REC" to start recording. A toolbar will then appear, allowing you to pause, resume, and stop recording flexibly.
Step 5. View the recordings
Once the recording is complete, you can view all the recorded files using the built-in player.

Conclusion
Naming the camera app Photo Booth might not have been the wisest choice on Apple's part. That's why, even with a built-in camera app, people still wonder how to take a picture on a Mac. Now, you and I know how to take a picture on a Mac and how to take a screenshot on a MacBook Air/Pro with the guide above. But if you're looking for better screen recording software for Mac other than the built-in one, you should definitely check out EaseUS RecExperts for Mac —you'll love it.
This article might also interest you : How to recover Mac files without software?
FAQ
1. How do I use the camera on my Macbook?
The webcam is primarily used for video conferencing, but you can also use the camera on your Mac to take photos. Open the built-in camera app (Photo Booth) and use it to take pictures on your Mac.
2. What is the shortcut for picture-in-picture on a Mac?
You can access Picture-in-Picture (PiP) mode on a Mac using QuickTime Player. All of these Apple-developed platforms have PiP functionality natively. However, if you are using Firefox, the keyboard shortcut to enter PiP mode is Command + Option + Shift + ] or Command + Option + Shift + ).


