

You've just realized you deleted an important file. And, as luck would have it, you emptied the recycle bin…
Fortunately, there are solutions. We'll see together how to recover a permanently deleted file, step by step, using Disk Drill, EaseUS Data Recovery Wizard, and Recuva software on Windows 10!
How to recover permanently deleted files with Disk Drill?
Disk Drill is software that can recover files from the Recycle Bin, even if it's empty. It can restore over 400 different file types on all Windows . It can also recover data from external media, such as USB drives, SD cards, or hard drives.
How do I use Disk Drill?
To use Disk Drill, simply follow these steps:
- Download the software from the official Disk Drill website – software to recover files from the recycle bin – and install it on your computer.
- Launch the program and select the hard drive where your lost files were located.
- Disk Drill will scan your disk and display the results in a window.
- Sort the files by name, size, date or type, and use the filter to refine your search.
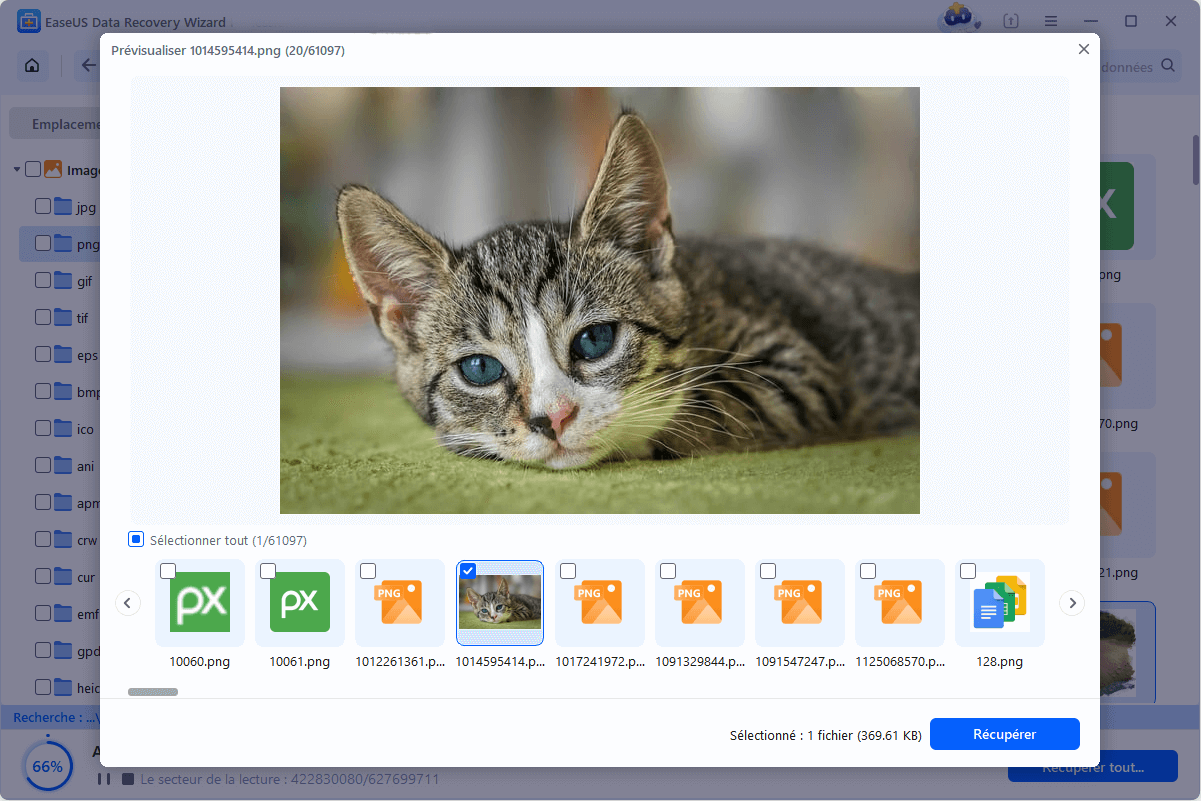
- Preview the file contents before retrieving it by clicking the “Preview” button.
- Check the boxes for the files you want to restore and click the “Recover” button.
- Choose a location to save your recovered files. It is recommended to choose a different drive than the one where the deleted files were located, to avoid overwriting the data.
Why choose Disk Drill?
Disk Drill is an efficient and easy-to-use software that can save you in case of accidental loss of important data. It offers many features, such as:
- The ability to recover files of any format and from any medium.
- The ability to preview files before restoring them.
- The ability to create a disk image to protect your data in case of hard drive failure.
- The ability to perform an in-depth analysis to recover even the most difficult-to-recover files.
- The ability to pause and resume scanning at any time.
Disk Drill is a software program for recovering files from the Recycle Bin that you can try for free and without risk. Feel free to download it and take advantage of its features.
Recover a deleted file with EaseUS Data Recovery Wizard
To learn how to recover a permanently deleted file , nothing could be easier with EaseUS Data Recovery Wizard!
If you are not familiar with it, it is one of the best data recovery software programs, and it works well on Windows 10/11 as well as on macOS.
Here are the steps to follow!
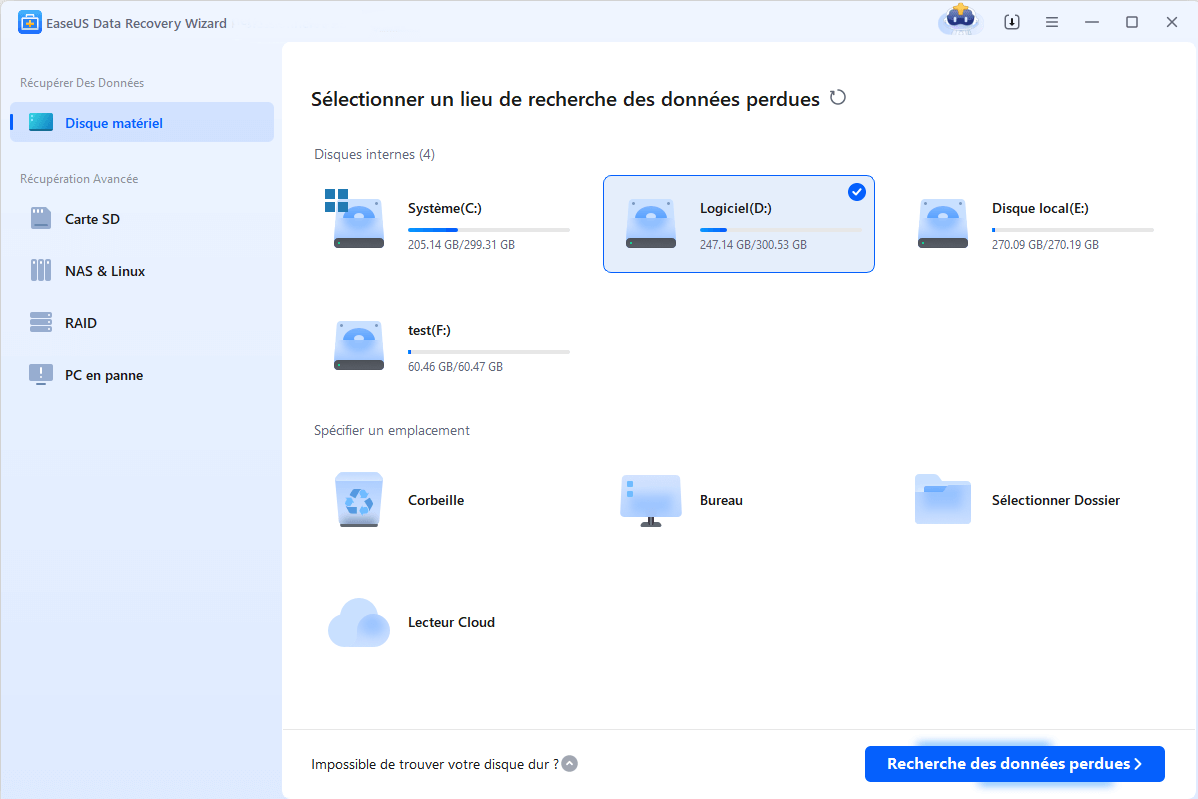
STEP 1. Choose the partition of your disk to recover
To begin, we invite you to download the EaseUS Data Recovery Wizard software; when you are on the menu, choose the disk partition or storage location where your files were deleted.
STEP 2. Press the "Analyze r"
Once you have selected the location to recover, press " Analyze ". The in-depth analysis process will begin!
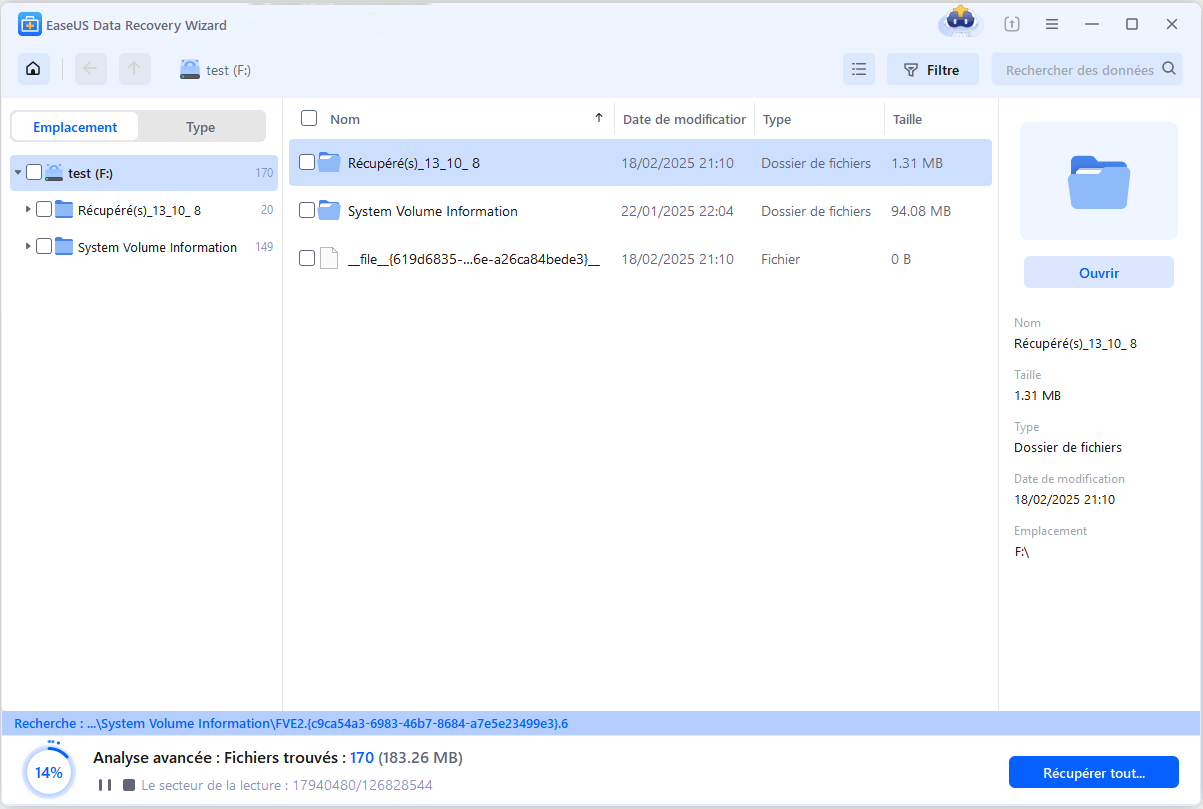
STEP 3. Click on Recover
Once the deep scan is complete, click the " Deleted Files " option in the left-hand menu. All your deleted files will be there! Simply select (check) the files you want to recover and click "Recover"!
For your convenience, we invite you to watch the video tutorial below:
Recover a permanently deleted file with Recuva
Recuva is a fairly well-known software. Its publisher is Piriform. This is the same publisher as CCleaner, which is mainly used to clean and optimize your computer under Windows.
Recuva allows you to recover deleted data. It can be downloaded for free from the "Piriform" website. For those who want the paid version, it costs a little over 19 euros (at the time of writing).
However, the free version is sufficient to recover accidentally deleted files.
It supports Windows XP/Vista/7/8/10.
We invite you to watch this tutorial video to recover your permanently deleted file!
- Step 1: In Google, type "Download Recuva Piriform".
- Step 2: Start downloading the free version.
- Step 3: Go to the "Downloads" folder.
- Step 4: Double-click on the Program to start the installation.
- Step 5: A screen will appear with the word "Recuva" and the software version. You can choose the language for installation: French.
- Step 6: Then click on "Install".
- Step 7: At the end of the installation, you can click on "Run Recuva / Launch Recuva".
A new window opens. "Welcome to the Recuva Assistant.".

- Step 8: Click on "Next".
- Step 9: Choose the type of files you want to recover: Images, Music, Documents, Videos, Compressed or Emails.
By default, Recuva will try to recover all types of files. Then, click "Next".

- Step 10: Select the location of the file(s) you want to recover: On a removable card, in My Documents, etc. If you don't know where the file was located before it was deleted, click "I'm not sure." Then, click "Next.".
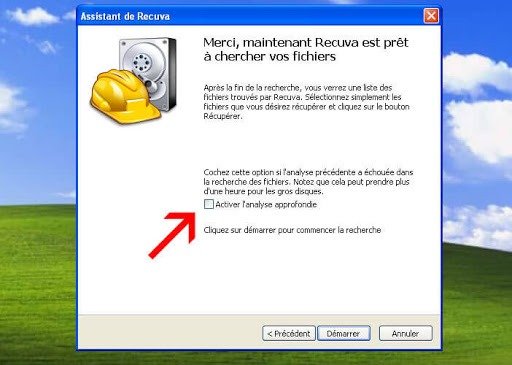
- Step 11: A new window will appear: "Thank you, Recuva is now ready to scan your files." You can click on Deep Scan if you wish. Then, click "Start.".
- Step 12: After analysis, Recuva displays the results: Recoverable files are shown in green, and unrecoverable files in red. Right-click the checkbox of the file(s) you wish to recover, then click "Recover" in the bottom left corner.
- Step 13: An Explorer window will appear, and you must choose a folder for Recuva to place the recovered files in. Click "OK".
- Step 14: A new window appears with the title: "Operation completed" with the number of files recovered (completely or partially).
Conclusion
So, if you've had a scare after deleting important files, you now know that solutions exist. In the vast majority of cases, you can recover permanently deleted files. However, remain cautious in the future, as sometimes files are unrecoverable. This is especially true when the deletion occurred a long time ago, and you have since created, moved, deleted, copied, or pasted other files onto the affected drive.


