

Have you ever had trouble printing a document in WordPad ? You're not alone! In this article, we'll guide you step by step to successfully print your documents without any hassle. Follow along and discover how to print in WordPad simply and efficiently.
Step 1: Open your document in WordPad
![]() The first step to printing your document is to open it in WordPad. If you haven't already done so, here's how:
The first step to printing your document is to open it in WordPad. If you haven't already done so, here's how:
- Press the Windows key and type "WordPad" in the search bar.
- Click on the application icon to open it.

- Go to the "File" menu in the top left corner of the window.

- Click on "Open" and select the document you wish to print.
This article might interest you: Printer paused under Windows 10: what to do?
Step 2: Checking print settings
Before starting the print job, it is crucial to check the print settings. To do this, follow the steps below:
- Go to the "File" menu in the top left corner of the window.
- Click on "Page Layout" to access the print settings.

- Check settings such as orientation (portrait or landscape), margins, and paper size.

- Make the necessary changes and click "OK" to confirm the changes.
Step 3: Printer Selection
Make sure the printer you want to use is selected. Here's how:
- Go to the "File" menu in the top left corner of the window.
- Click on "Print".

- In the window that opens, select the desired printer from the drop-down list.
Tip: Add a printer
If your printer does not appear in the list, you may need to add it manually. Here's how:
- Press the Windows key and type "printers" in the search bar.
- Click on "Printers and scanners" to open the settings.
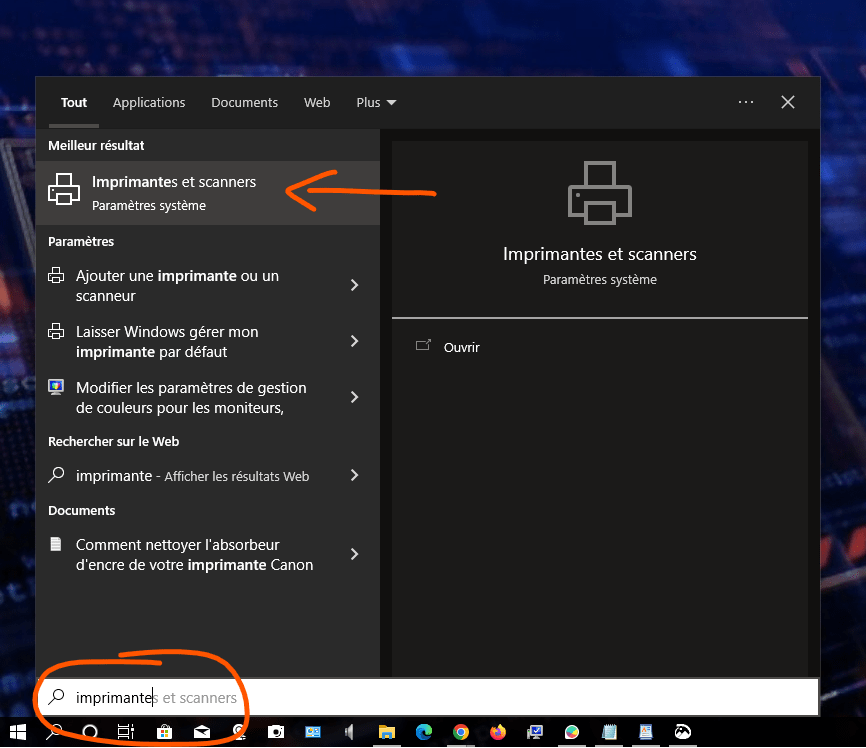
- Click on "Add a printer or scanner" and follow the on-screen instructions to add your printer.

Also read: How to set a video wallpaper for the Windows
Step 4: Start printing
You are now ready to print your document. Follow these steps to start printing:
- Go to the "File" menu in the top left corner of the window.
- Click on "Print".
- In the window that opens, check the print settings and the number of copies to print one last time.
- Click on "Print" to start printing your document.
Step 5: Solving common problems
Sometimes you might encounter problems when printing from WordPad. Here are some solutions to common problems:
Problem: The printer is not working
Solution: Make sure the printer is powered on, properly connected to your computer, and has enough ink and paper.
Problem: The print quality is poor
Solution: Check the print quality settings in the "Print" window and make sure they meet your needs. You can also try cleaning your printer's print heads.
Problem: The text is cut off or misaligned
Solution: Adjust the layout settings, such as margins and orientation, in the "Layout" menu of WordPad.
Now that you've followed this step-by-step guide, you should be able to print from WordPad without any problems. Remember to regularly check your print settings and make sure your printer is working properly to get the best possible results. Happy printing!


