

Partitioning a hard drive is essential for anyone looking to optimize storage space, install multiple operating systems, or simply organize their files more efficiently. But how do you do it? What tools are needed? And most importantly, how can you ensure the process goes smoothly? This article will guide you step-by-step through the hard drive partitioning process, simplifying technical terms so even non-experts can understand.
Why partition a hard drive?
Partitioning a hard drive involves dividing a physical disk into several independent sections, called partitions. Each partition can be formatted and used as a separate disk. This operation offers several advantages.
First, it allows you to separate system files from personal files, thus reducing the risk of data loss in case of system corruption. Second, it facilitates the installationof multiple operating systems on the same disk, offering increased flexibility. Finally, it allows for better file organization, making file management more intuitive.
Preparation for partitioning

Before beginning the partitioning process, it is crucial to back up all important data on your hard drive. Partitioning involves changing the disk structure and carries a risk of data loss. Opt for an external hard drive or a cloud computing service to store your files securely.
Choose a partitioning tool
Various partitioning tools are available, each with its own features and user interface. Popular options include:
- Disk Management Windows : Integrated into Windows, this tool offers a simple interface for basic partitioning operations.
- EaseUS Partition Master : A feature-rich third-party software offering advanced options and support for various file systems.
- GParted : A powerful and versatile open-source solution, particularly appreciated by experienced users.
Detailed guide to partitioning
Let's take the example of partitioning an internal hard drive under Windows 10 using the Disk Management tool:
Back up your data
Connect an external hard drive or use a cloud computing service to copy all the files on your internal hard drive.

Open Disk Management
Right-click the " This PC " icon in File Explorer and select " Manage". In the left pane, choose " Disk Management".
Identify the hard drive to be partitioned
Locate the internal hard drive you want to partition in the list of drives at the top of the window.
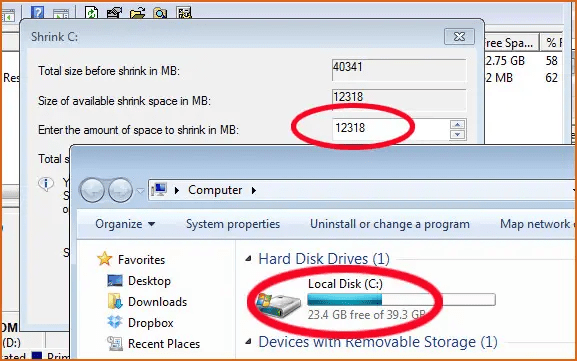
Reduce the existing partition (optional)

If you want to redistribute space on an existing partition, right-click on that partition and select " Shrink Volume". Specify the amount of space to free up for the new partition.
Create a new partition
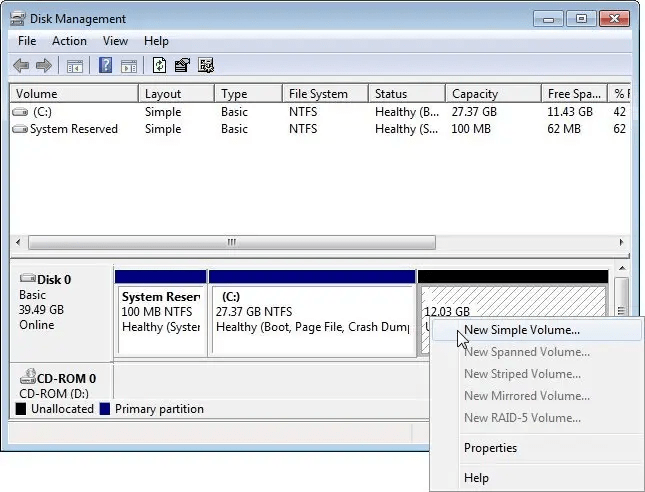
Right-click on the unallocated space and select " New Simple Volume". Launch the Simple Volume Wizard and follow the on-screen instructions.
Assign a size and a label to the score
Specify the size of the new partition in MB or GB. Assign it a descriptive label for easy identification.
Format the partition (optional)
Choose an appropriate file system for the partition, such as NTFS for Windows or exFAT for cross-platform sharing. Assign a volume label and perform a quick or full format.
This article might interest you: How to recover data from a failed SSD hard drive?
Apply and confirm
Review the selected settings and click " Finish " to apply the changes and create the new partition.
Common mistakes to avoid
Partitioning a hard drive may seem complex, but by following the steps described above, you should be able to do it without any problems. However, some common mistakes can occur. For example, not making a backup before starting can lead to data loss if something goes wrong.
Furthermore, failing to check the available disk space can make the partitioning process difficult. Finally, it is important to follow the instructions precisely and not interrupt the process, as this could corrupt the data on the disk.
How to manage partitions after they are created

Once you have created and formatted your partitions, it is important to know how to manage them effectively. You can resize, delete, or merge partitions using the Windows Disk Management tool or third-party software such as EASEUS Partition Master Free.
To resize a partition, right-click the desired partition and select " Resize/Move". To delete a partition, right-click and select " Delete VolumeDisk Management tool Windows does not support this functionality.


